 ExsionTime 4.0 Help
 Nederlands
YouTube
How do I use ExsionTime
Installation Manual

Version Control
| Author | Date | Version | Change |
|---|---|---|---|
| Matthijs | 24-10-2025 | 0.1 | English |
| Matthijs | 27-10-2025 | 1.0 | First complete English version |
Minimum Requirements
- ExsionTime License
- Access to Business Central
- Server or user with an Office License
Download ExsionTime
To get started with ExsionTime, we need to install ExsionTime in both Business Central and on the server.
Downloading ExsionTime in business central
- Open Business Central
- Click the search icon or use the keyboard shortcut Alt + Q
- Search for Microsoft AppSource-apps
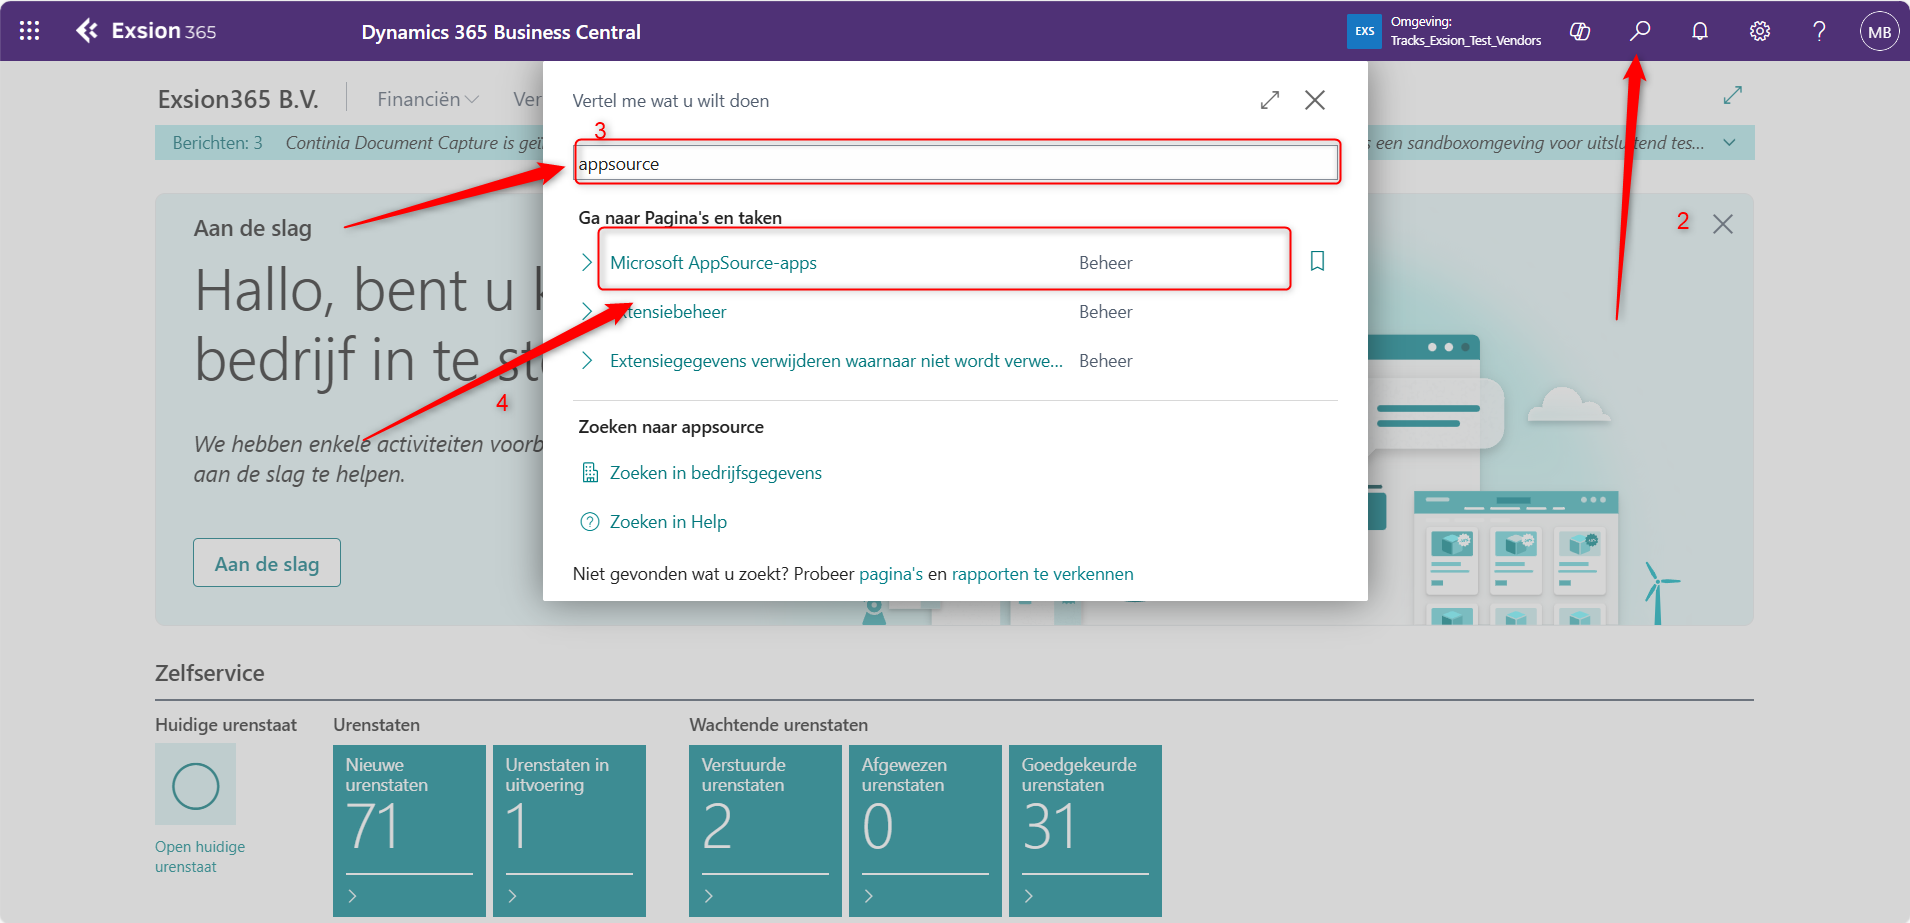
- Open Microsoft AppSource-apps
- Search for ExsionTime
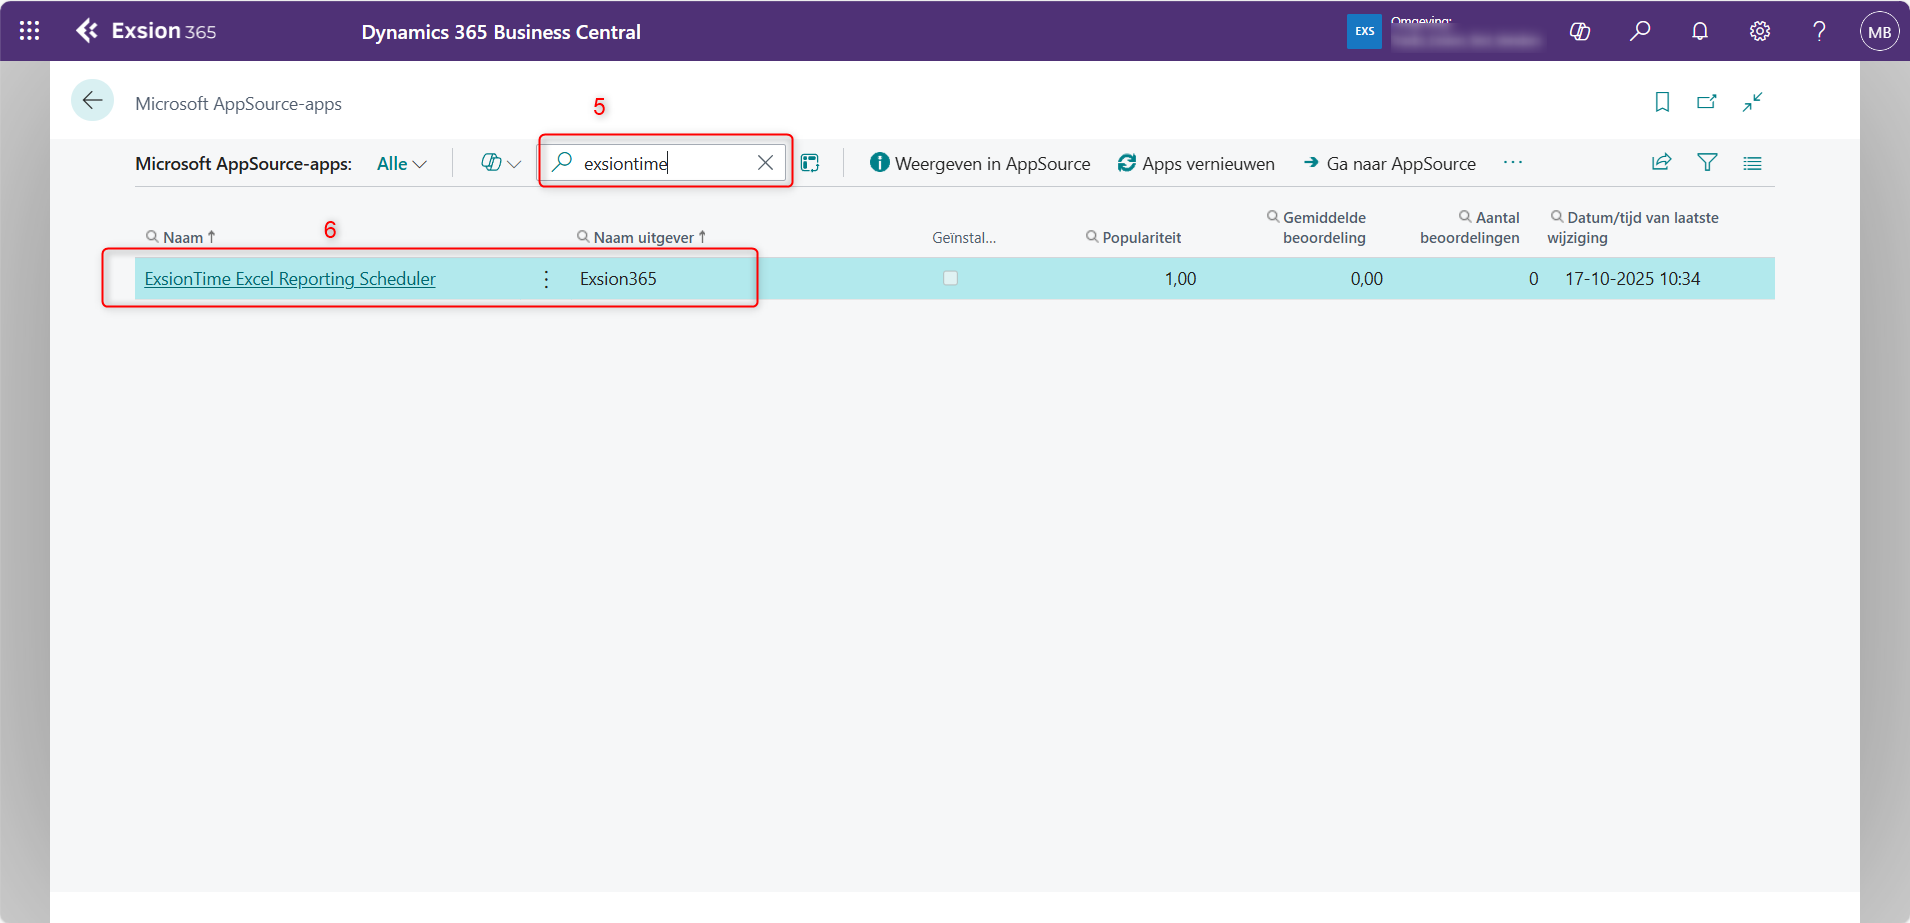
- Click on ExsionTime Excel Reporting Scheduler with Publisher Name Exsion365
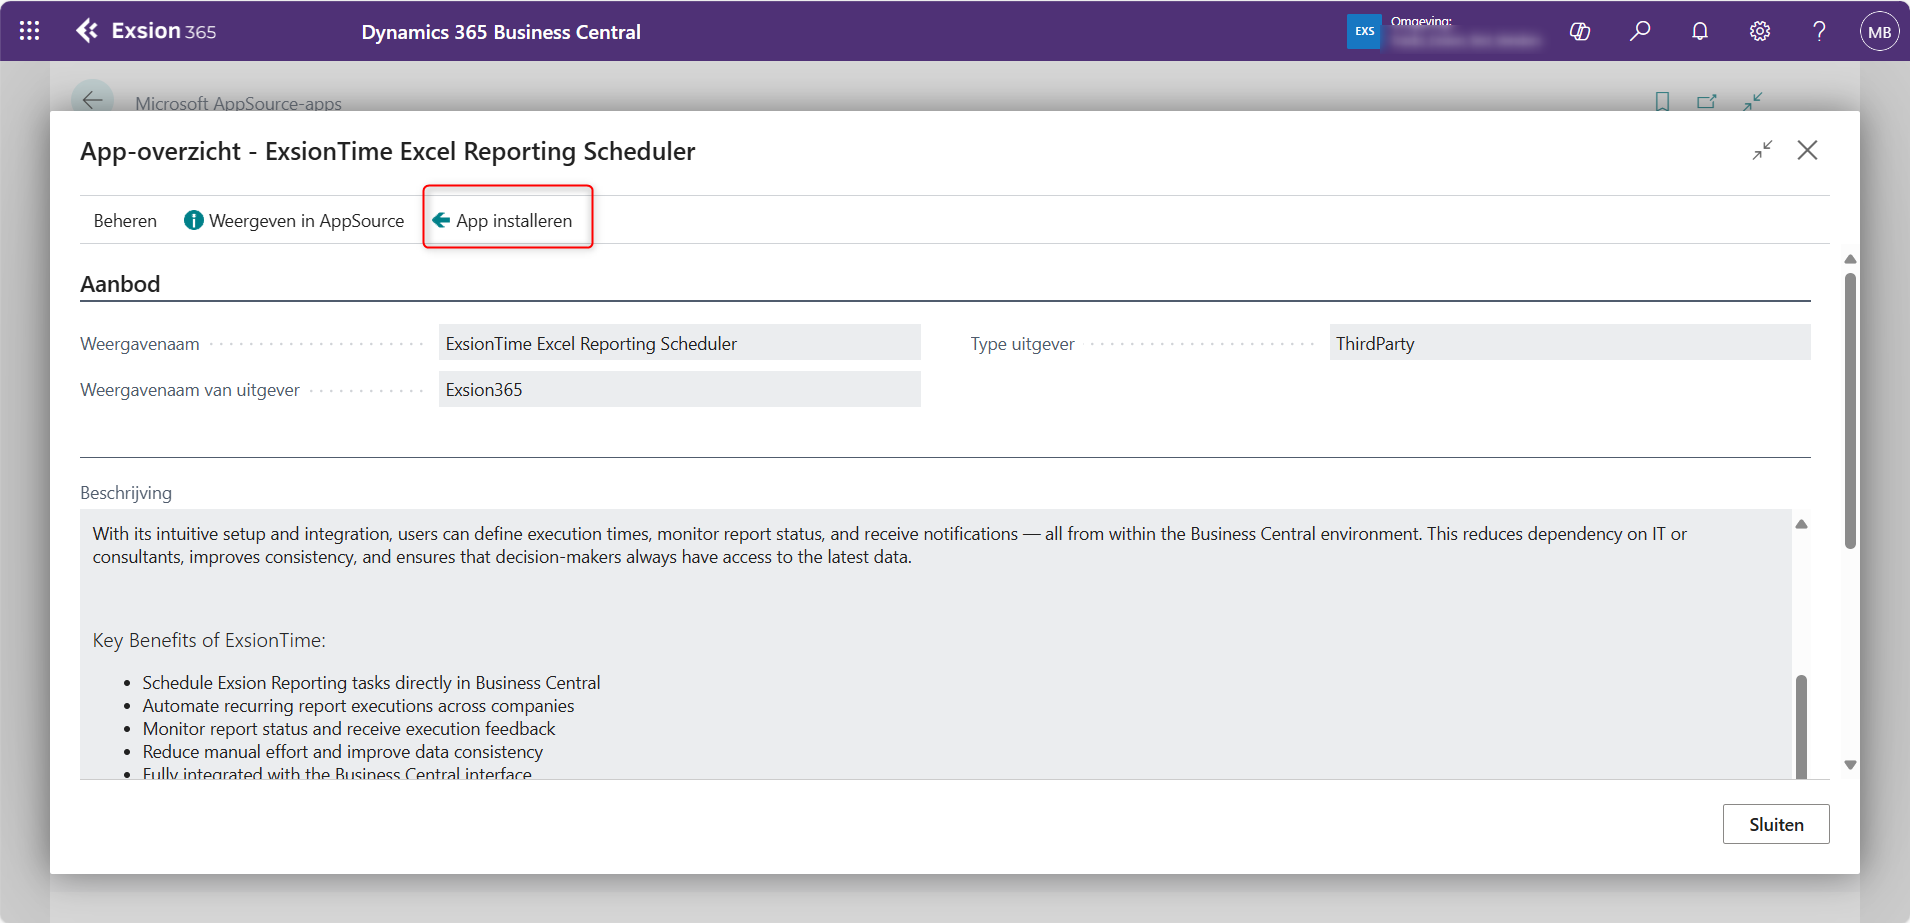
- Click on Install App
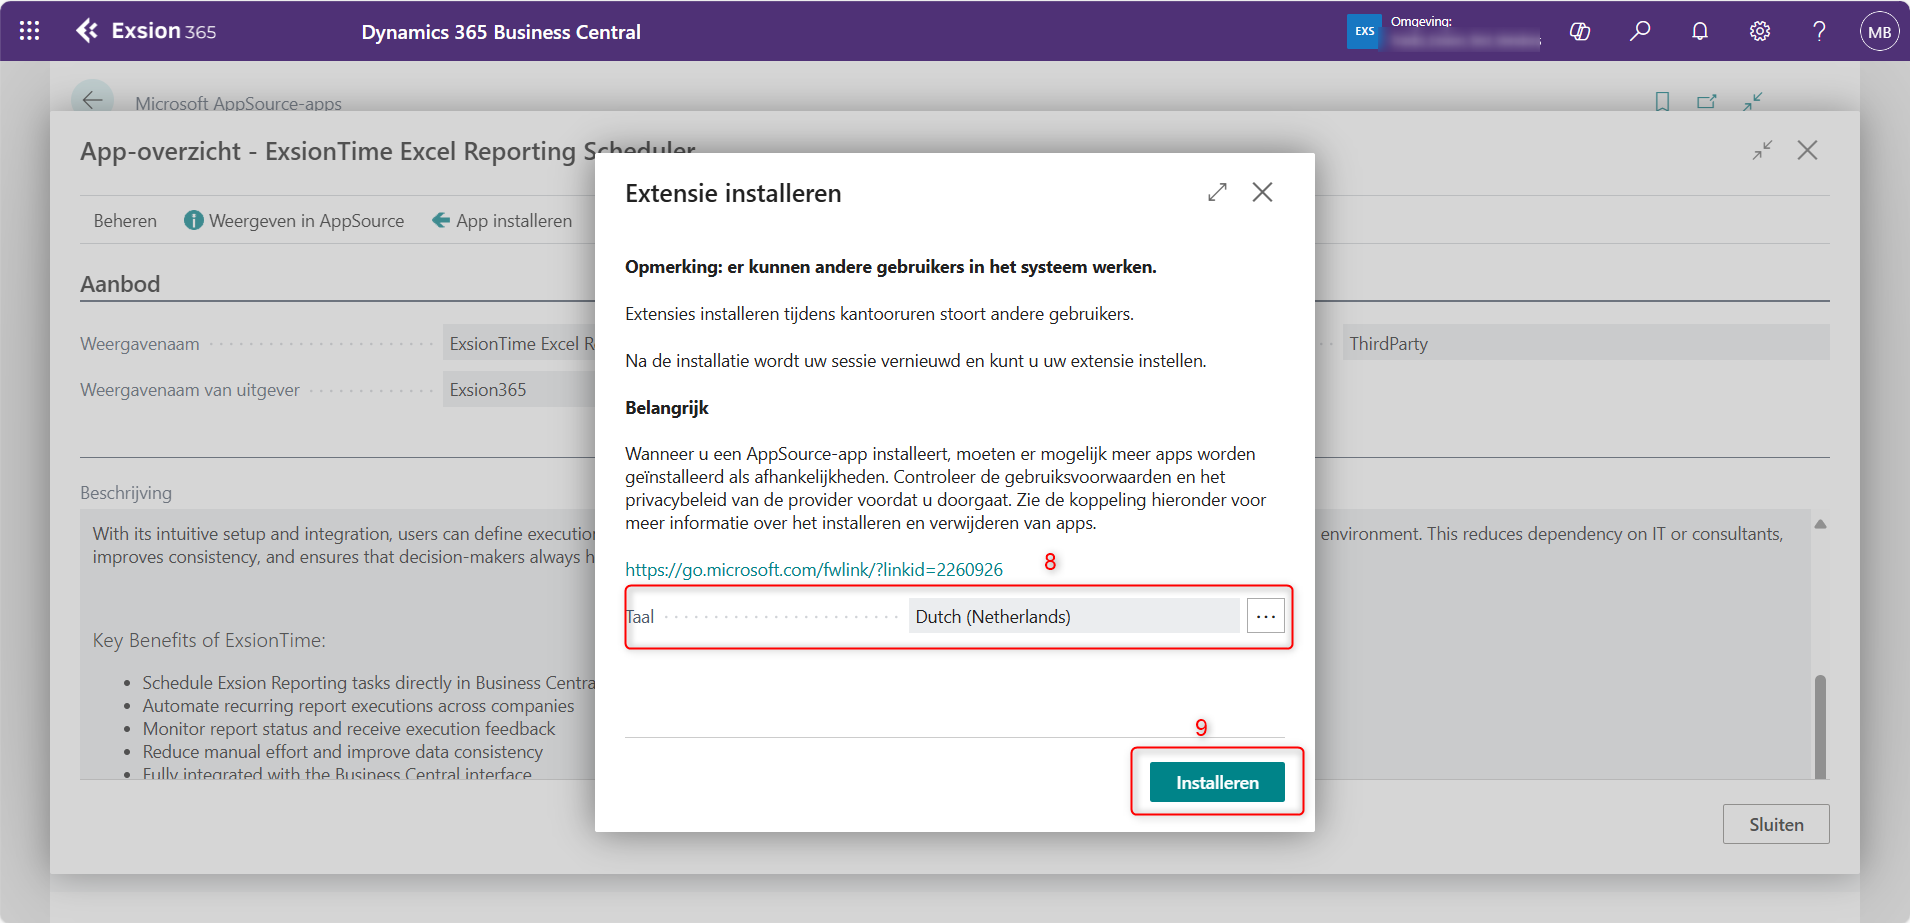
- Optionally adjust your language settings (the default is the language used in Business Central).
- Click “Install” (Note: You need business central admin rights to do this)
You can monitor and manage this on the Extension Management page.
Once the installation is complete, we perform a final check
- Click the search icon in Business Central or use the keyboard shortcut Alt + Q
- Search for ExsionTime
- Click ExsionTime – Report List
If you see ExsionTime – Report List here, it means the app has been successfully installed in your Business Central environment.
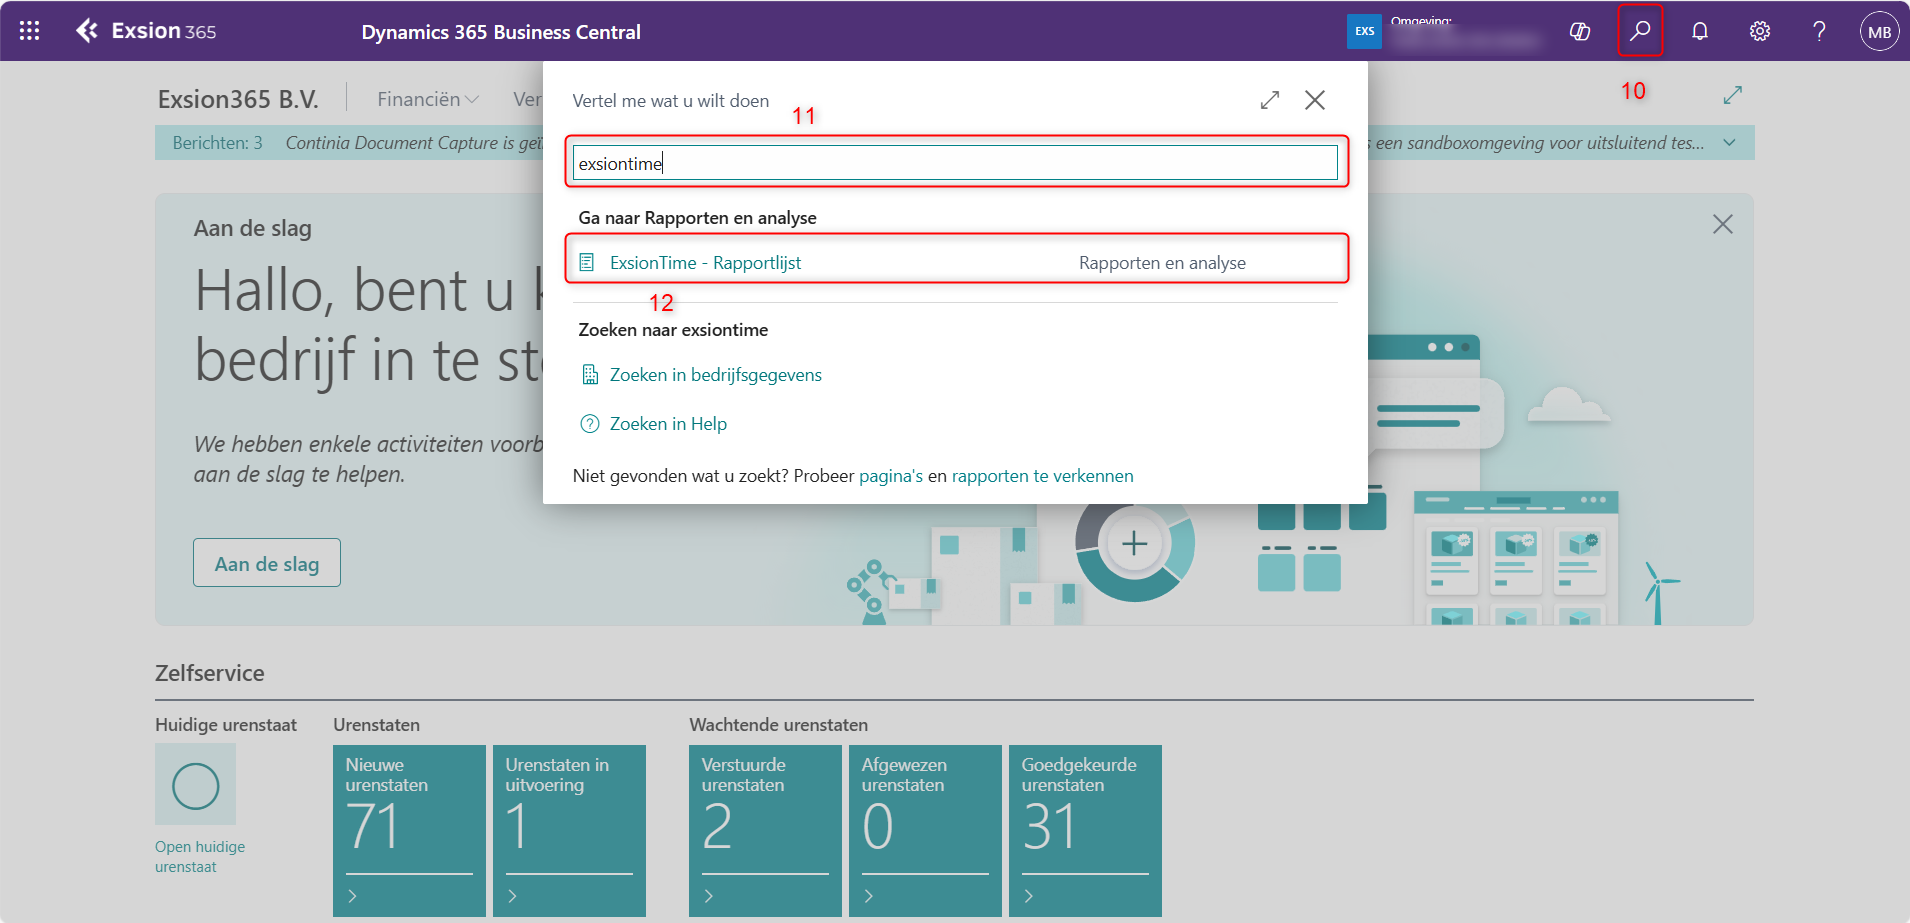
We can now proceed with the installation on the server.
Downloading ExsionTime on the Server or User Device
To ensure ExsionTime functions fully, we also need to install it on the server or on the user's device. The main difference is that a server can refresh and send reports at any time, making it more efficient. On a user device (like a laptop or desktop), it's more difficult to guarantee that the machine is always on and available for refreshing and sending reports.
- Go to: https://docs.exsion365.com/exsiontime4/en/
- Beneath the Download button click on the blue ExsionTime button

- Click on the three dots
- Click on Keep
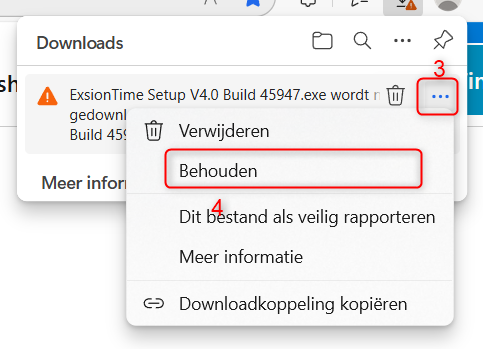
- Click on the arrow on the blue delete button
- Click on keep anyway
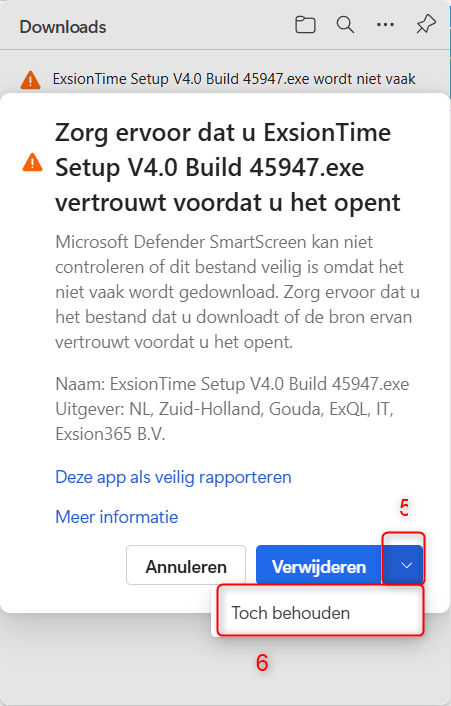
- Next, click on it to open.
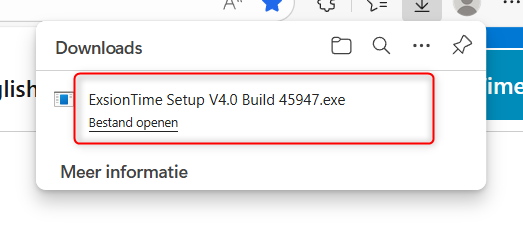
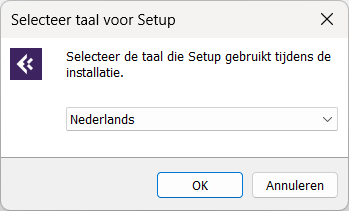
- The installation of ExsionTime will now begin. Select the language you want to use during the installation and click OK.
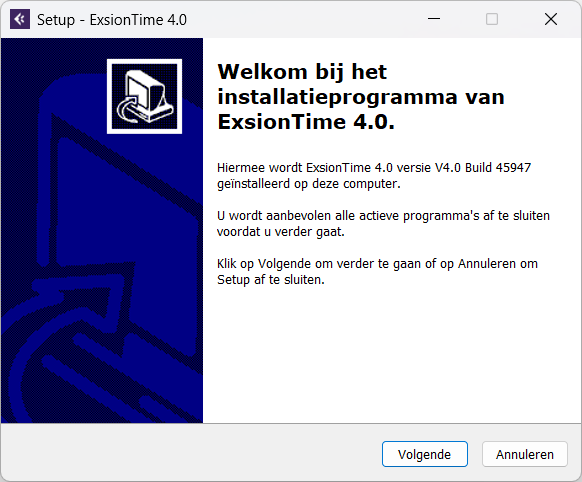
- Click on next
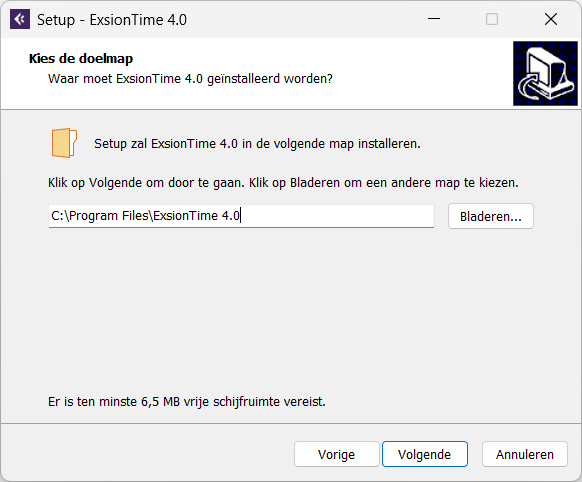
- Choose the installation location
Ensure that the user or the account logged in on the server has full access to this location.
- Confirm the location (you can also keep the default) and click Next.
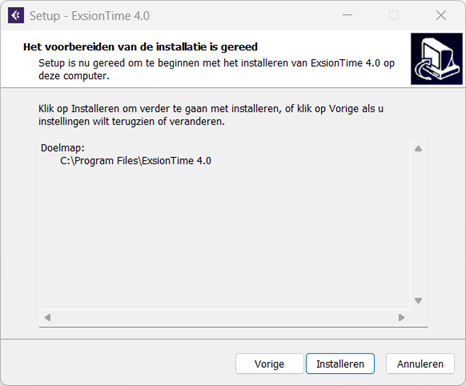
- Click Install on the final screen
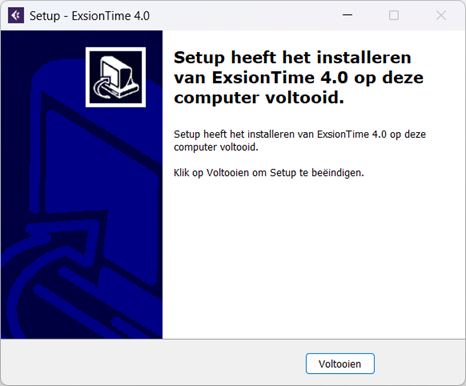
- ExsionTime will now install and display finish to complete the process
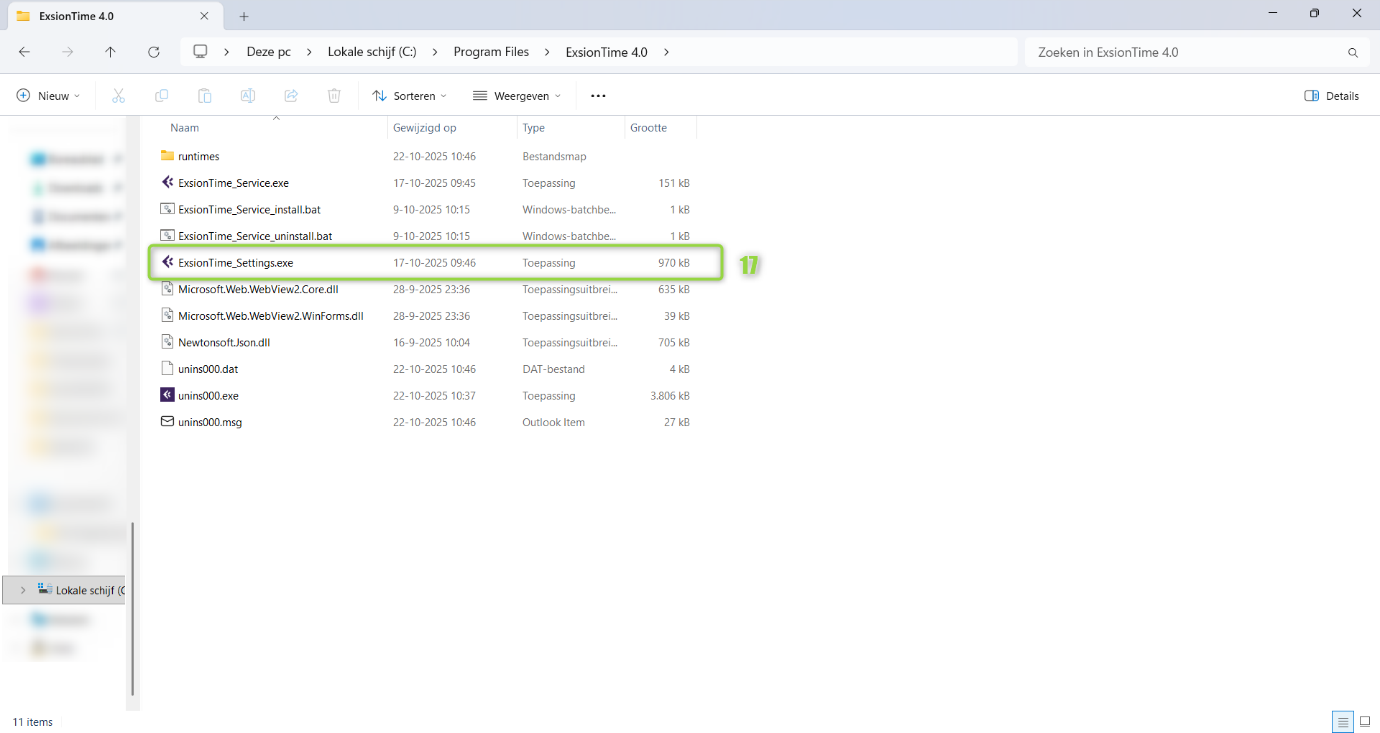
- Navigate to the location where ExsionTime was installed. In this example, we used the default path: C:\Program Files\ExsionTime 4.0.
- The folder should look like this:

- Double-click ExsionTime_Settings.exe (If you don’t see the .exe extension, that’s because file extensions are hidden by default. In this example, extensions are visible because the setting “Show file extensions” is enabled.)
- In the Mail section, enter the account that will refresh and send the reports. This should be the same account used for Business Central.
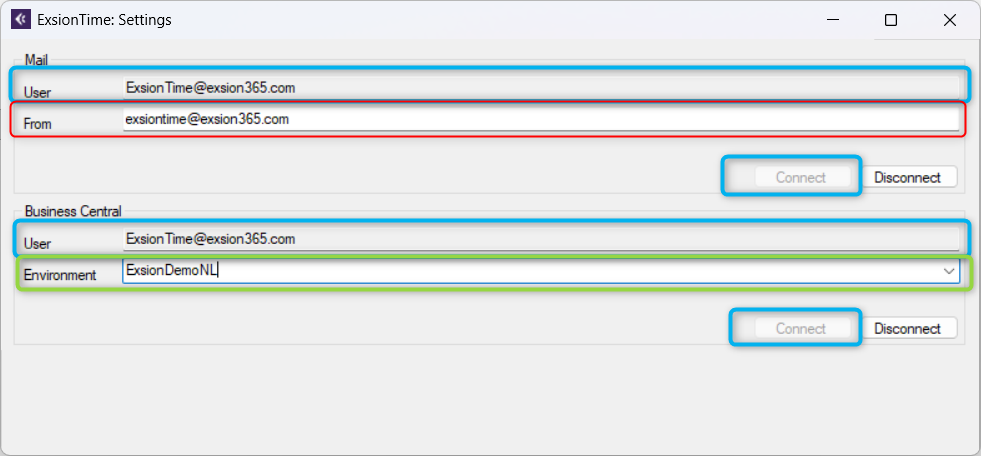
- If you want to change the “From” address (highlighted in red in the screenshot above) to send emails from a different address, you can do so. However, the account listed under “User” must have access to the account you are using to send emails.
- After entering the details for both Mail and Business Central (highlighted in blue in the ExsionTime Settings screenshot), click Connect.
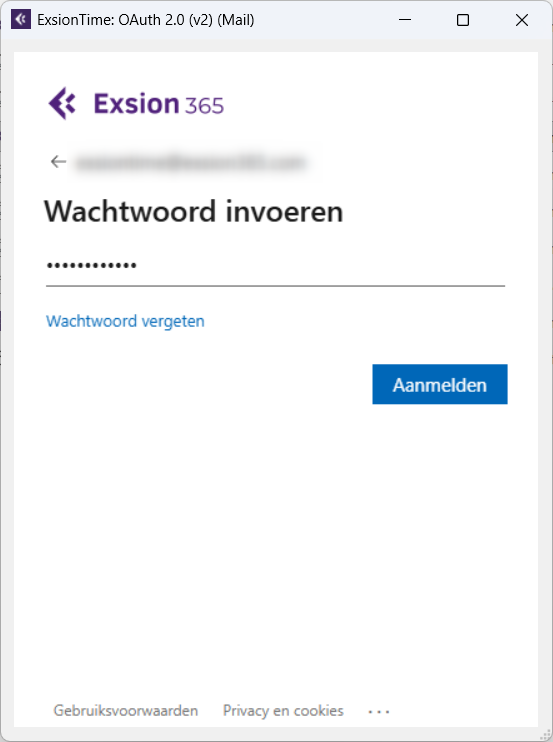
- You will be redirected to an OAuth login screen. Log in with the account you just specified.
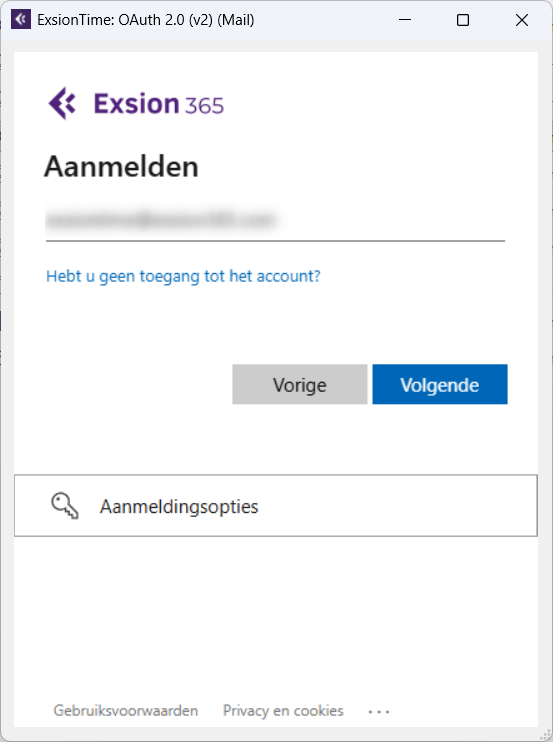
- Click Next and enter the password for the specified account on the following screen.
- Repeat the previous steps for the Business Central connection.
- Once both connections have been established, the Connect button will be greyed out, and the Disconnect button will become available. This indicates that the connections are active.
- Due to current OAuth settings, you will need to reconnect approximately once per month. This may vary depending on your IT administration.
- Confirm this with your IT administrator.
- As the final step in ExsionTime Settings, select the correct environment (highlighted in green in the screenshot). This will be the environment where the reports will be loaded. Click the dropdown menu under Environment and select the environment where Exsion reports will be imported and managed.
Note: This does not mean you cannot access other environments. You can still use ExsionBC reports across multiple environments with downloads, provided the account being used has the necessary permissions in Business Central.
Activating Service Reports
To ensure that all reports are refreshed at the correct times, one final step is required on the server or user account to make sure everything runs in the background.
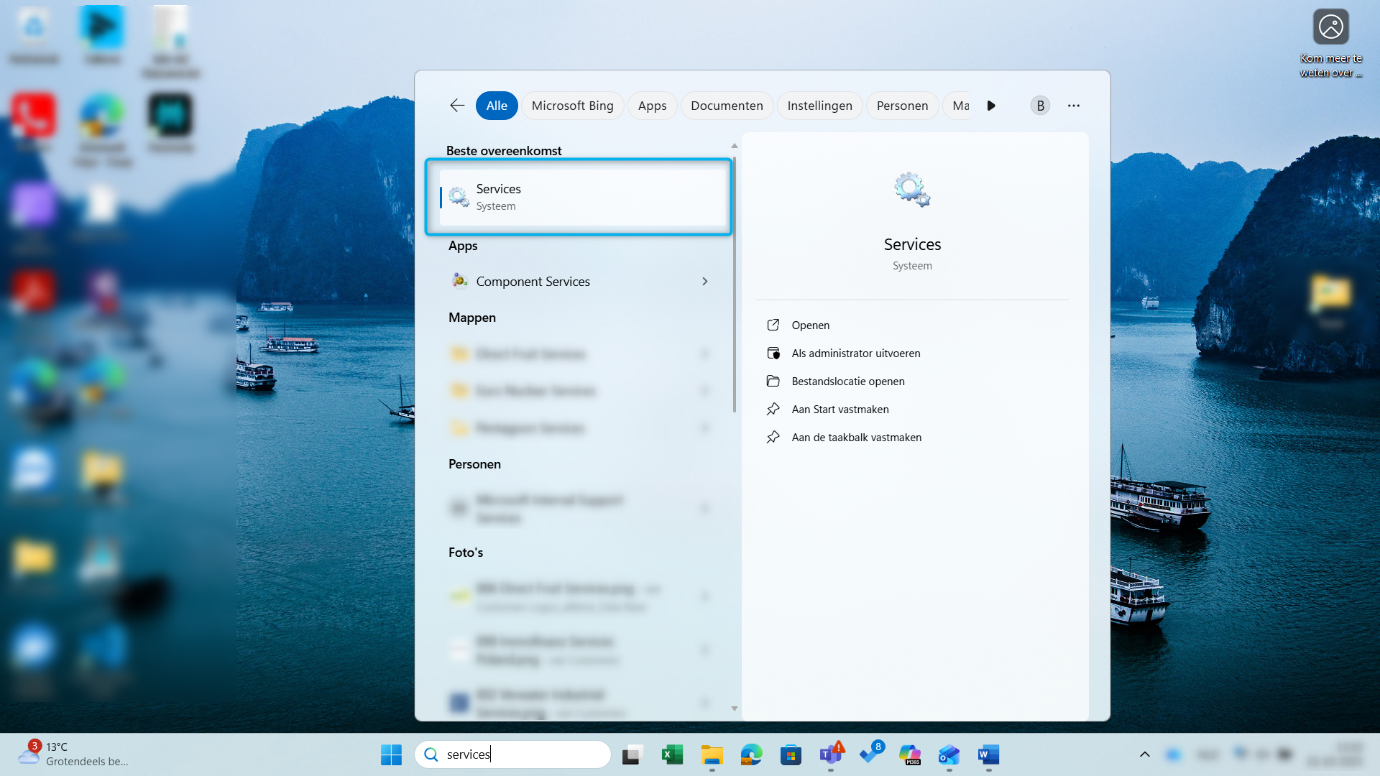
- Search for “Services” on the server, laptop, or desktop and open it by clicking on it.
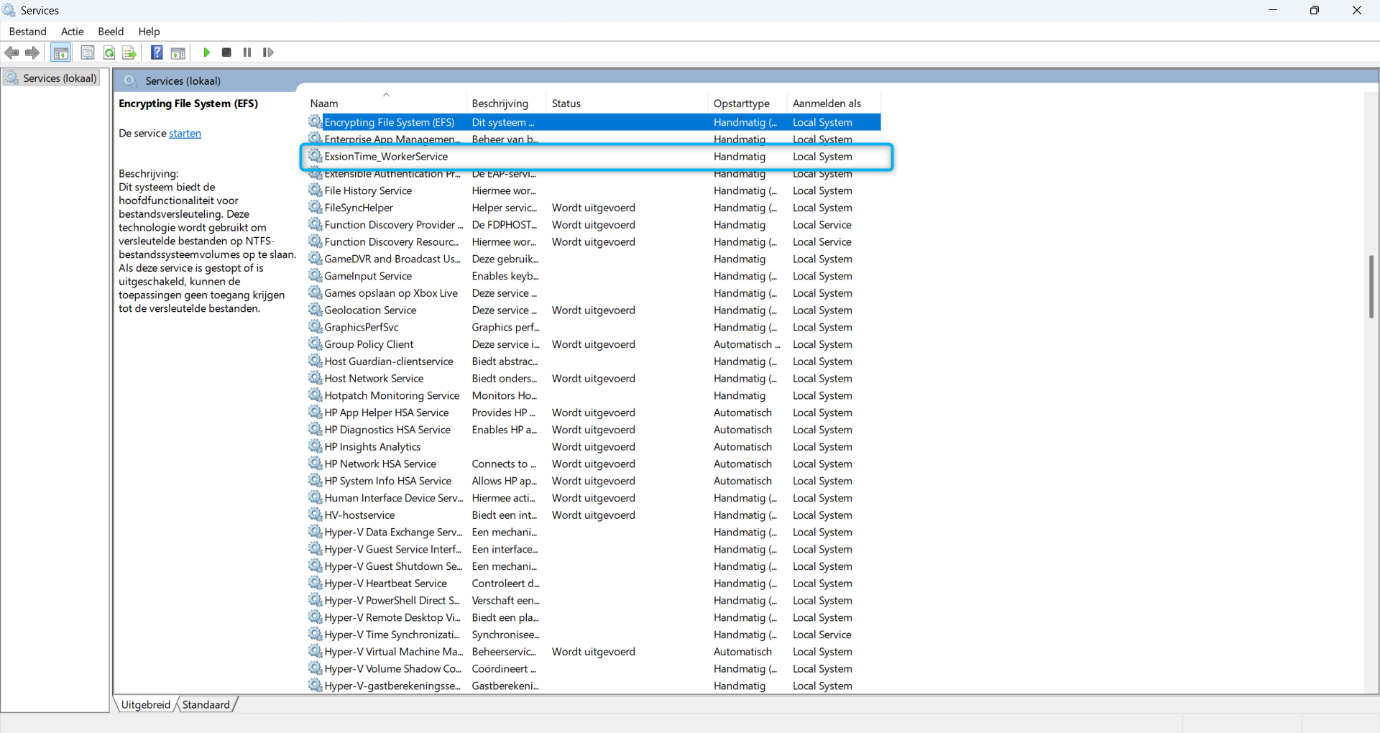
- Select one of the entries in the middle of the next screen and press E on your keyboard. This will take you to the section where all services starting with the letter “E” are listed.
- You will now see ExsionTime_WorkerService listed.
- Right-click ExsionTime_WorkerService.
- Click Properties to open the Worker Service settings.
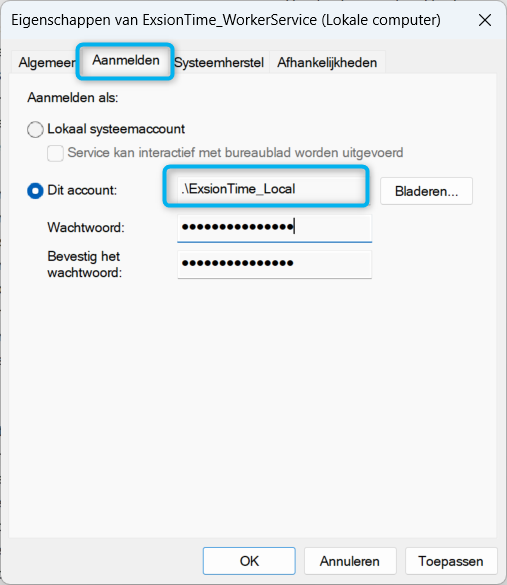
- Go to the Log On tab.
- Select the option This account.
- Click Browse…
- Ensure that the (local) admin account is used here.
- Return to the General tab.
- Change the Startup type to Automatic (Delayed Start).
- This ensures that if the server restarts for any reason, the service will automatically start again.
- Once everything is configured, click Start (red button).
- Finally, click Apply (green button).
Completion
If all steps have been successfully completed, the installation of ExsionTime 4 is finished.
Congratulations! You can now start using ExsionTime in Business Central.
If anything is unclear, please contact your IT department or reach out to us directly so we can work together to find a solution.
You can do this by sending an email to support@exsion365.com.
User Manual

Version Control
| Auteur | Datum | Versie | Aanpassing |
|---|---|---|---|
| Matthijs Boon | 10-22-2025 | 0.1 | First concept |
| Matthijs Boon | 10-24-2025 | 0.2 | Adjustments on request |
| Matthijs Boon | 10-28-2025 | 1.0 | English |
User Manual ExsionTime
Below, we explain how to work with ExsionTime 4 integrated with Business Central.
We assume that ExsionTime is already fully installed and all steps from the installation document have been successfully completed.
Purpose of the Application
ExsionTime is designed to automatically refresh reports, adjust them based on parameters, and then send these reports to specified email addresses. This helps ExsionBC users receive reports at fixed times without manual intervention.
Features
- Interface in Business Central
- Report Selection: Users can choose a report from a list of available reports.
- Parameter Settings: Users can set parameters applicable to the selected report.
- Time and Recurrence: Users can schedule the date and time for refreshing the report, including recurrence options such as daily, weekly, monthly, etc.
- Email Settings: Users can enter specific email addresses to which the report should be sent.
- Current Reports Overview: Displays reports currently being refreshed, including status information such as last refresh time and any errors.
- Output
- Refreshed Excel Files: The application generates an updated Excel file based on the configured parameters.
- Email Delivery: The refreshed report is automatically sent to the specified email addresses.
Business Central ExsionTime
Permission Sets in ExsionTime
ExsionTime uses permission sets to define which actions users can perform within Business Central. Assigning the correct permissions ensures a clear separation between users who manage reports and those who only view them. This prevents errors and maintains consistency in reporting.
From ExsionTime, we provide two permission sets with the installation:
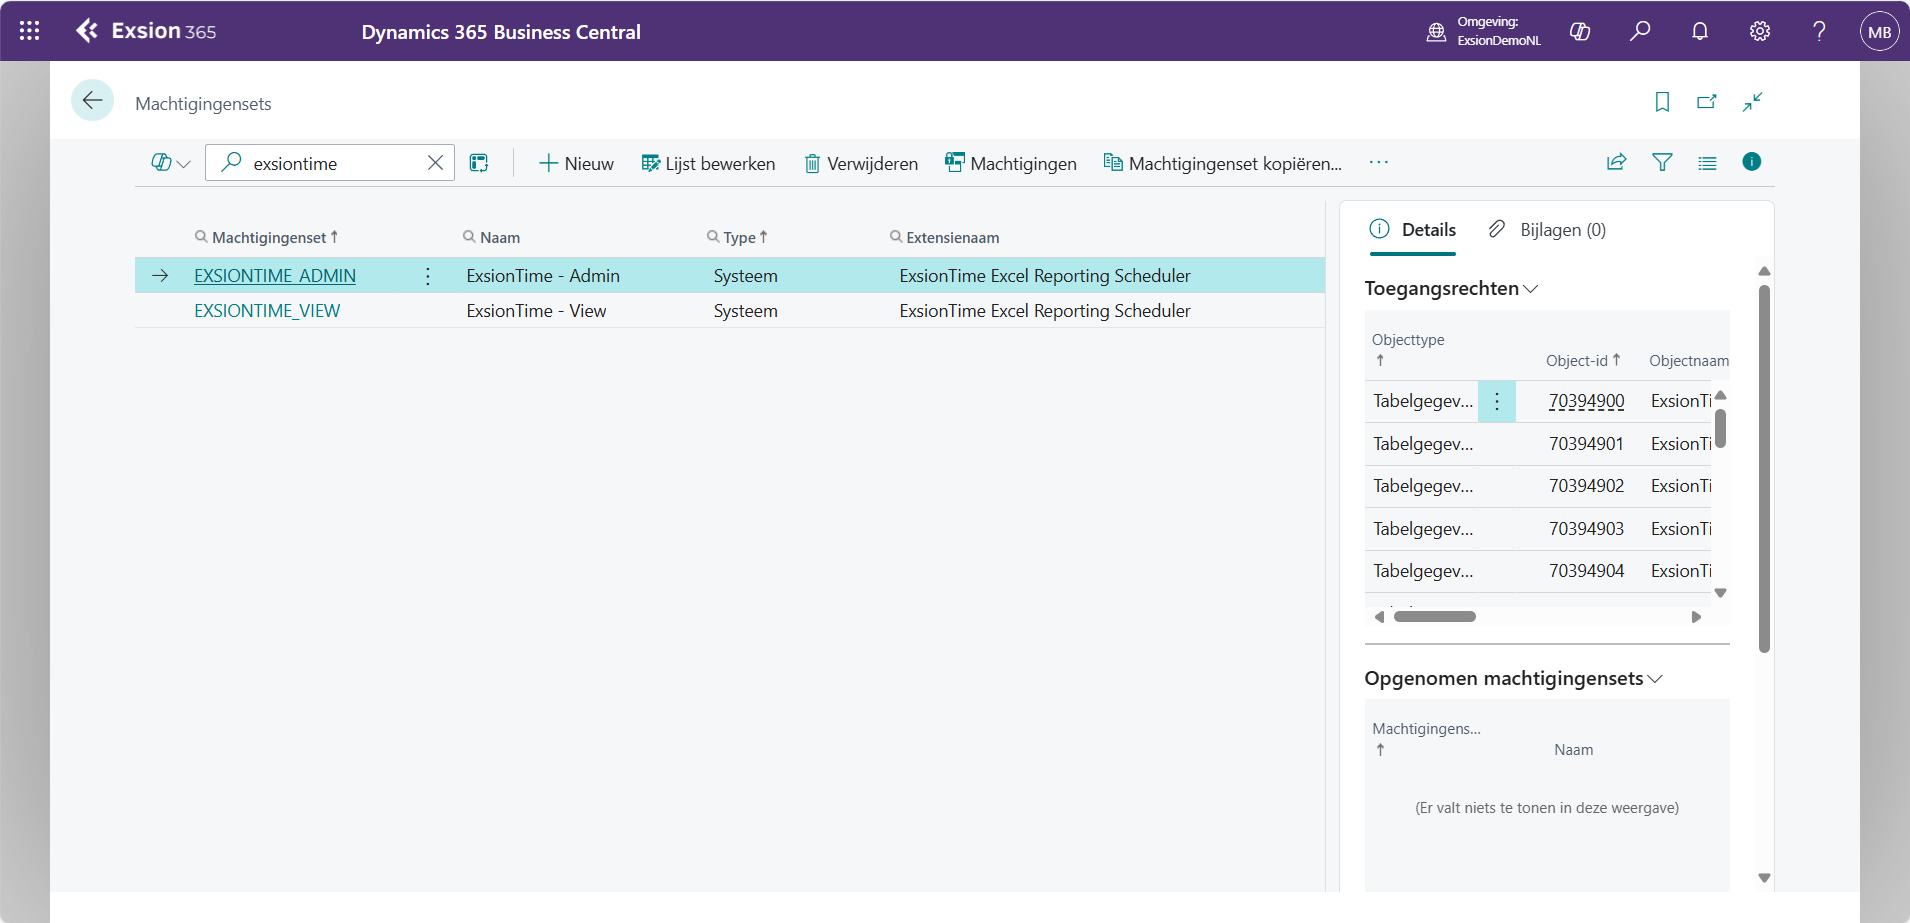
ExsionTime_Admin
This permission set is intended for Business Central users responsible for managing and modifying ExsionTime reports. With these rights, they can:
- Edit reports
- Create new reports
- Delete reports
Recommendation: Limit this permission to one or two users to avoid conflicts or inconsistencies between different reports.
ExsionTime_View
This permission set is intended for users who are only allowed to view reports. As the name suggests, this set grants read-only access.
It can generally be assigned to all users who need insight into the reports.
Note: Users with this permission can view all reports available in ExsionTime.
This set is useful when you want users to see sent reports and their scheduled times without allowing them to modify templates.
For more details on Business Central permissions, refer to Microsoft Learn:
Define granular permissions - Business Central | Microsoft Learn
Using ExsionTime
To watch a quick overview video of ExsionTime, click here: ExsionTime How to ENG
Report Management
- How to upload a new report in ExsionTime
- How to edit an existing report
- How to delete a report
How to Upload a Report in ExsionTime
- Open Business Central
Start Business Central as you normally would.
- Search for ExsionTime
Use the search icon in the top-right corner or press Left Alt + Q to open the search field.
Then type “ExsionTime” in the search box.
- Open the Report List
Click “ExsionTime – Report List” in the search results.
- Start the Upload Process
Click the “Upload Report” button at the top of the page.
- Upload the Report
- Drag the desired report file into the drag-and-drop area, or
- Click the upload window to manually select a file from your computer.
-
Check the Overview
After uploading, the report will automatically appear in the report list.
How to Edit an Existing Report
Defined Names
-
Open the Report List
Go to the main ExsionTime screen in Business Central and open the report list.
-
Select a Report
Click the row of the report you want to edit.
Note: The row must have an arrow at the beginning, indicating the report is selected.
-
Open Editing Options/b>
In the top bar of the screen, you’ll see various options to modify the report.
-
View Defined Names
Click “Defined Names" to open an overview of all named cells in the report.
Here you’ll see:
- The name of the cell (as defined in the Exsion report)
- The sheet where the cell is located
- The field the cell refers to
-
Edit the List of Defined Names
Click “Edit List” at the top to adjust additional settings.
-
Adjust Cells via Checkboxes
In edit mode, you can:
Disable cells in the “Enabled” column so they are no longer used in parameters from ExsionTime.
⚠️ Note: Disabled cells cannot be referenced anywhere in ExsionTime.
Indicate whether a cell acts as a filter in report downloads or formulas in the “Is Filter” column.
Sheets
View Report Tabs
Click “Sheets” at the top."
- A new window opens showing all tabs of the selected report.
- This is for viewing only, not for editing.
Task List
-
Select the Report
Click the row of the report for which you want to manage tasks.
Ensure the arrow at the beginning of the row is visible (this means the report is selected).
-
Open the Task List
Click “Task List” at the top.
Note: You are opening the task list for the selected report.
-
Overview of Buttons
In this screen, you’ll see new buttons and some that were present in the previous screen. Here you can configure more detailed settings.
Columns in the Task List
-
Trigger
Set how often the task should run: daily, weekly, specific days, or specific weeks of the month.
-
Start Time
Specify the time when the report should be refreshed and optionally sent.
-
Enabled
Check this box when the task is ready for use. This activates the task.
Tip: Do this last to avoid errors.
-
Save As
Define the file name.
You can use named cells from the report, for example:
Payments week [weeknr]
If [weeknr] is a named cell, the report will be saved with the current week number.
-
Path
Specify where the file should be saved.
This can be a local path, a synced OneDrive folder, or an FTP location (as long as it’s accessible without extra login screens).
-
Convert Formulas to Values
Convert Exsion formulas to values after refreshing.
Useful when sharing reports with colleagues or external parties who don’t have access to Exsion or underlying data.
-
Next Execution Time
Shows the next scheduled run.
-
Last Execution Time
Indicates when the task last ran.
-
Last Error
Displays a checkmark if an error occurred during the last run.
-
Last Message
Shows the error message or status.
-
Created By
Indicates who created the task.
-
Created On
Date and time of creation.
Button: New
- Click “New” to create a new task for the selected report.
- After clicking, a blank row will appear in the task list.
- You can create multiple tasks for one report.
Useful if you want to send the same report to different recipients, each with its own filter.
Button: Edit list
- Activate Edit mode.
- Without this button, you cannot make changes to tasks — this prevents accidental modifications.
Button: Delete
- Delete the selected task or multiple tasks at once.
Note: This permanently removes the task.
Button: Defined Name Values
- Open a screen where you can assign a value to each named cell for the task.
- If you leave a cell empty, the report uses the original value.
- If a cell is missing, check whether it exists in the report or is not disabled in the main screen under “Named Cells”.
Button: Sheets
- View what should happen to each sheet:
- Visible: The sheet remains as is.
- Hidden: The sheet is hidden (like “Hide” in Excel).
- Very Hidden: The sheet is not visible and cannot be restored by the recipient.
- Delete: The sheet is completely removed during refresh/send.
Button: Schedule
- Set advanced execution criteria for the task.
Basic Settings
- Scheduled Date/Time: Choose trigger (daily, weekly, days/weeks of the month).
- Start Date: First time ExsionTime may run the task.
- Start Time: Time when the task should start.
- Stop Task if Long Duration: Default is 10 minutes. Increase for large reports.
Trigger-Specific Settings
- Daily: Run every X days.
- Weekly: Run every X weeks and on which days.
- Days of the Month: Choose months and specific days (including “last day of the month”).
- Weeks of the Month: Choose months, weeks, and days within those weeks.
Advanced Settings
- End Date: Optional, task stops after this date.
- End Time: Task may repeat multiple times per day until this time.
- Repeat Every: Frequency of repetition (e.g., every 5 minutes).
- Repeat Duration: Total duration of repetition (e.g., 1 hour).
- Example: 60 min / 5 min = 12 repetitions during 1 hour from start time.
Enable Task
- Check “Enabled” to activate the task.
Button: Email
- Configure the email to be sent with the selected task.
- Options:
- To, CC, BCC:
- Enter email addresses manually or use named cells from the report, e.g.:
[Email addresses task 1]
Ensure the cell contains addresses in this format:
mail@mail.com; mail2@mail.com; ...
- Enter email addresses manually or use named cells from the report, e.g.:
- Subject and Body:
- You can also use named cells, e.g.:
Report week [weeknr]
This inserts the current week number from the report into the subject and body, allowing dynamic and personalized emails based on report data.
- You can also use named cells, e.g.:
- To, CC, BCC:
Button: Run Now
- Execute the selected task immediately.
- Useful for:
- Testing a new task.
- Re-running a task that previously failed.
Other Features on the ExsionTime Report List Screen
Download Report
- Use the “Download Report” button to retrieve the uploaded report.
- This is helpful if you no longer have the original report file but need to make changes that cannot be done in ExsionTime (e.g., adding new downloads in the Exsion report itself).
Delete a Report in ExsionTime
- Open the Report List
Go to the main ExsionTime screen in Business Central and open the report list.
- Select the Report
Click the row of the report you want to delete.
- Ensure the arrow at the beginning of the row is visible (this means the report is selected).
- Click Manage
In the top bar, click “Manage”.
- Delete the Report
Click "Delete".
⚠️ Warning:
- This deletes all selected reports.
- It also removes all underlying tasks linked to these reports.
- Think carefully before performing this action, as it cannot be undone.