ExsionTime Help
 Nederlands
Installation manual

Version Control
| Autor | Date | Version |
|---|---|---|
| Matthijs Boon | 21-03-2025 | 0.1 |
| Matthijs Boon | 26-03-2025 | 0.2 |
| Matthijs Boon | 28-03-2025 | 0.3 |
| Matthijs Boon | 02-07-2025 | 0.4 addition of Office365 |
| Matthijs Boon | 09-07-2025 | 1.0 Finalising ExsionTime 3.0 |
Minimal requirements
- Entra environment (office 365) or SMTP server (SMTP).
- A server where ExsionTime can be installed (to run reports outside working hours).
- Office 2016 or higher, including shared components (32 or 64 bit).
- Exsion installed.
- DotNet Runtime 4.8
- Administrator’s rights on server (During installation).
- Entra admin present/available approval app registration.
- Acces to the Windows Task Scheduler.
- An account to execute tasks in the Task Scheduler. This account must be a Local Administrator, have an active Exsion License, and the right to log in as a batch job.
Downloading ExsionTime
To download ExsionTime, go to the following page:
https://docs.exsion365.com/exsiontime/en/

Click on ExsionTime at the top right of your screen and download the installer.
Installation ExsionTime
Note: for the following steps you need administrator rights at the installation location.
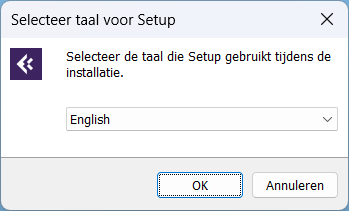
Go to your downloads and double-click the .exe installer ExsionTime. Select the language you want to use for installation and click OK.
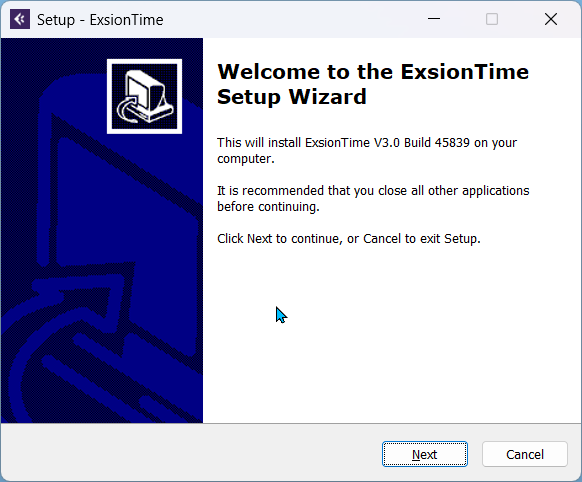
Click on next.
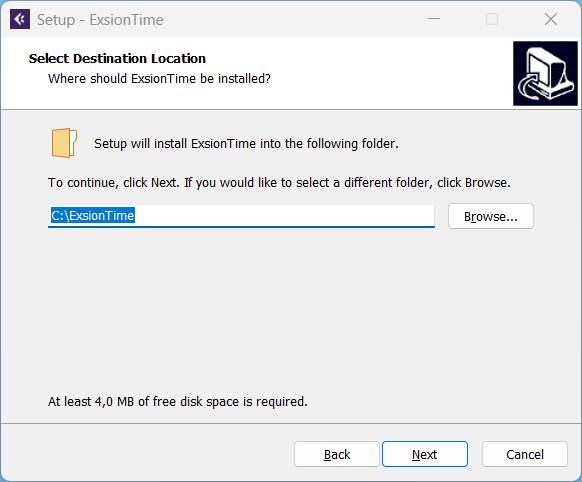
Select the folder where you want to install ExsionTime. Click Next once the correct folder is selected.
As a final step, click Install once you're sure of the selected location.
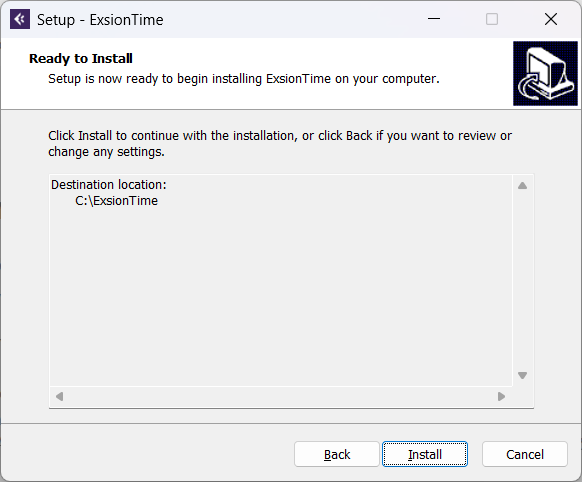
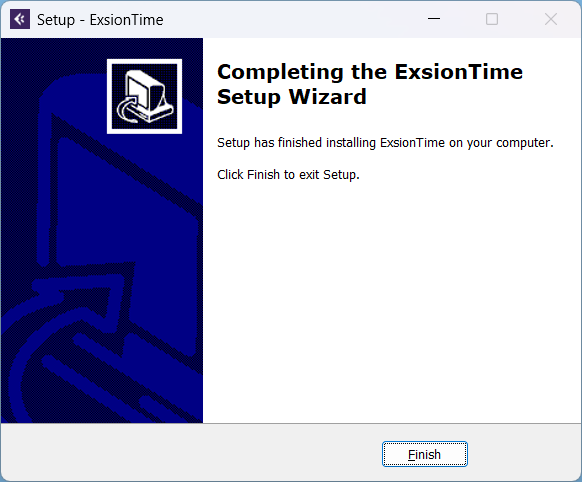
ExsionTime is now installed.
Mail Activation
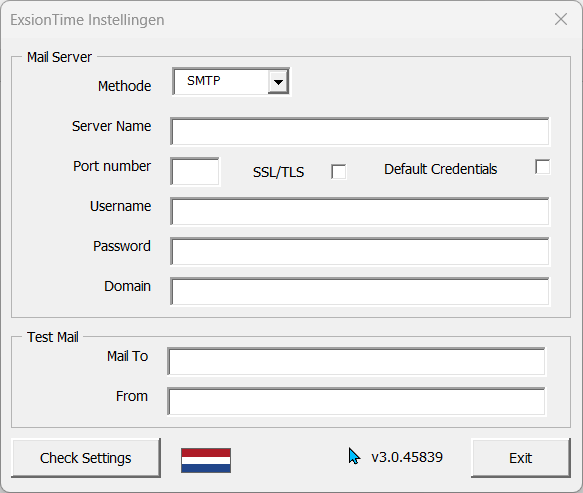
Go to the folder in your explorer where you installed ExsionTime in the previous step. There is a file named ExsionTime, open this file.
You will then see the following screen; we have 2 options for mail traffic;
- SMTP
- Office 365
You can switch between these options by selecting the method: SMTP or Office 365.
SMTP-Server
| Field | Description |
|---|---|
| Server Name | Enter your SMTP server here. |
| Port number | Enter the port used by your SMTP. |
| SSL/TLS | Always check this. |
| Default Credentials | Check this if the SMTP login is the same as the Excel user. |
| Username | Enter the username that will refresh the reports. (Note: requires Excel + Exsion license) |
| Password | Enter the password of the user above. |
| Domain | Optionally enter the domain of the user (can usually be left blank) |
| Mail To | Enter an email address to send the test mail to. This is one-time. |
| From | Enter the email address the test mail should come from. |
Office365
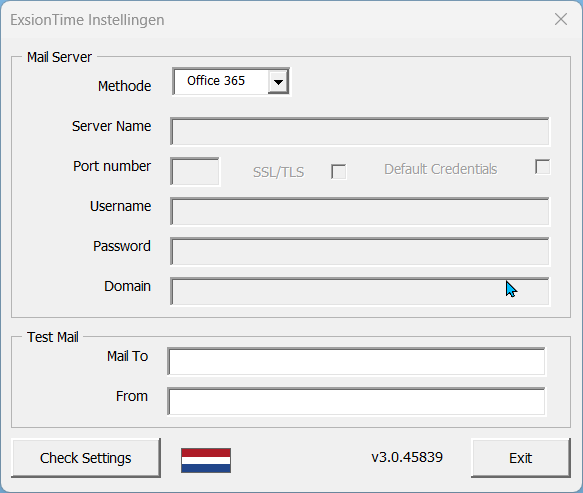
| Field | Description |
|---|---|
| Mail To | Enter an email address to send the test mail to. This is a one-time action. |
| From | Enter an email address here where the test mail should come from. |
Note: This is the account that will be used during the use of ExsionTime, from this email address all the reports will be sent with.
Test mail en configuratie
Once all the above data is correctly filled in with either SMTP or Office365, click Check Settings. If the test mail arrives at the specified Mail To address, the SMTP server configuration was successful and ExsionTime can now be used.
When you click on “Check” in Office 365, you will need to log in once with the account you will be sending emails from, i.e. the one entered in the “From” field. You will then see the following screen:
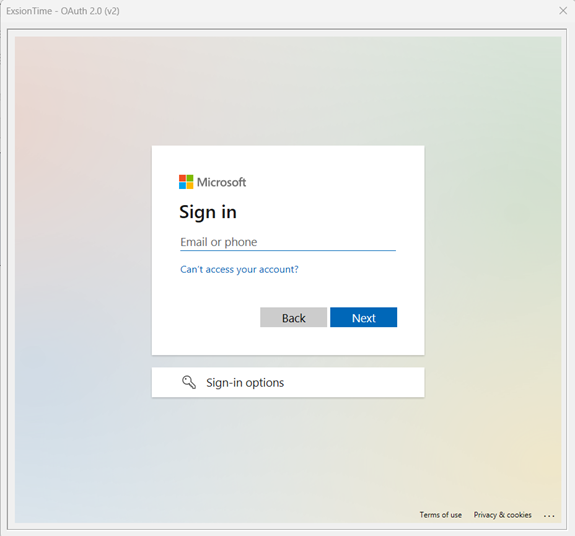
Enter your from email address here and click next, enter your password and you will be taken to the step where the entra admin is required:
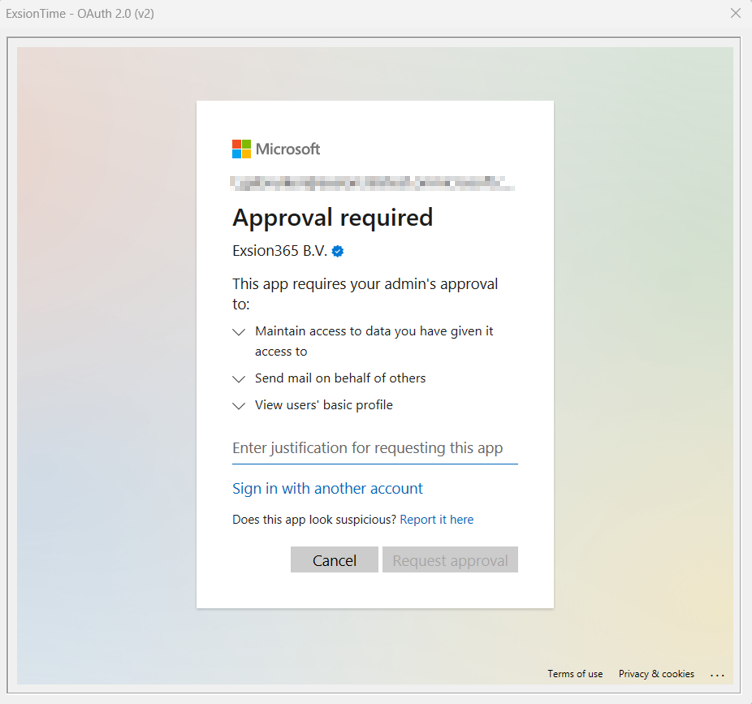
There are two ways to deal with this.
1. You can submit your request in the text field here, and it will be sent to someone from the management team in Entra Office. It can be rejected or approved by the admin from the Entra management team.
2. If the admin is available and present, you can click on ‘sign in with another account’. Log in here with the Entra admin account and it will be approved immediately without step 1.
Installation completed
These are the steps required to install ExsionTime. For usage instructions, please refer to the ExsionTime user manual. If you do not have this document, you can find it at:
https://docs.exsion365.com/exsiontime/en/
User Manual

Version Control
| Auteur | Datum | Versie | Comment |
|---|---|---|---|
| Matthijs Boon | 06-02-2025 | 0.2 | |
| Matthijs Boon | 11-02-2025 | 0.3 | |
| Matthijs Boon | 21-02-2025 | 0.4 | |
| Matthijs Boon | 28-02-2025 | 0.5 | |
| Matthijs Boon | 02-07-2025 | 0.6 | |
| Matthijs Boon | 08-07-2025 | 0.6B | Addition English |
| Matthijs Boon | 09-07-2025 | 1.0 | Finalising ExsionTime version 3.0 |
User Manual.
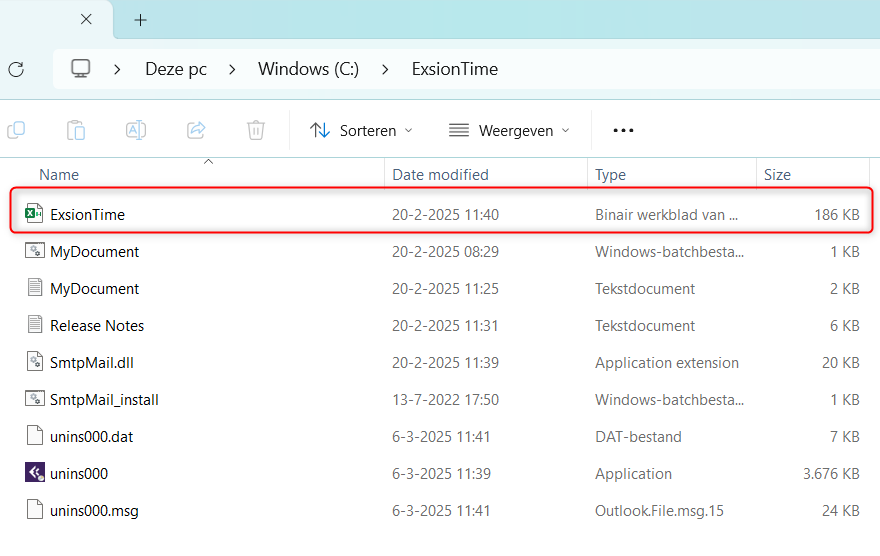
When ExsionTime is installed for the first time, your folder will look like this:
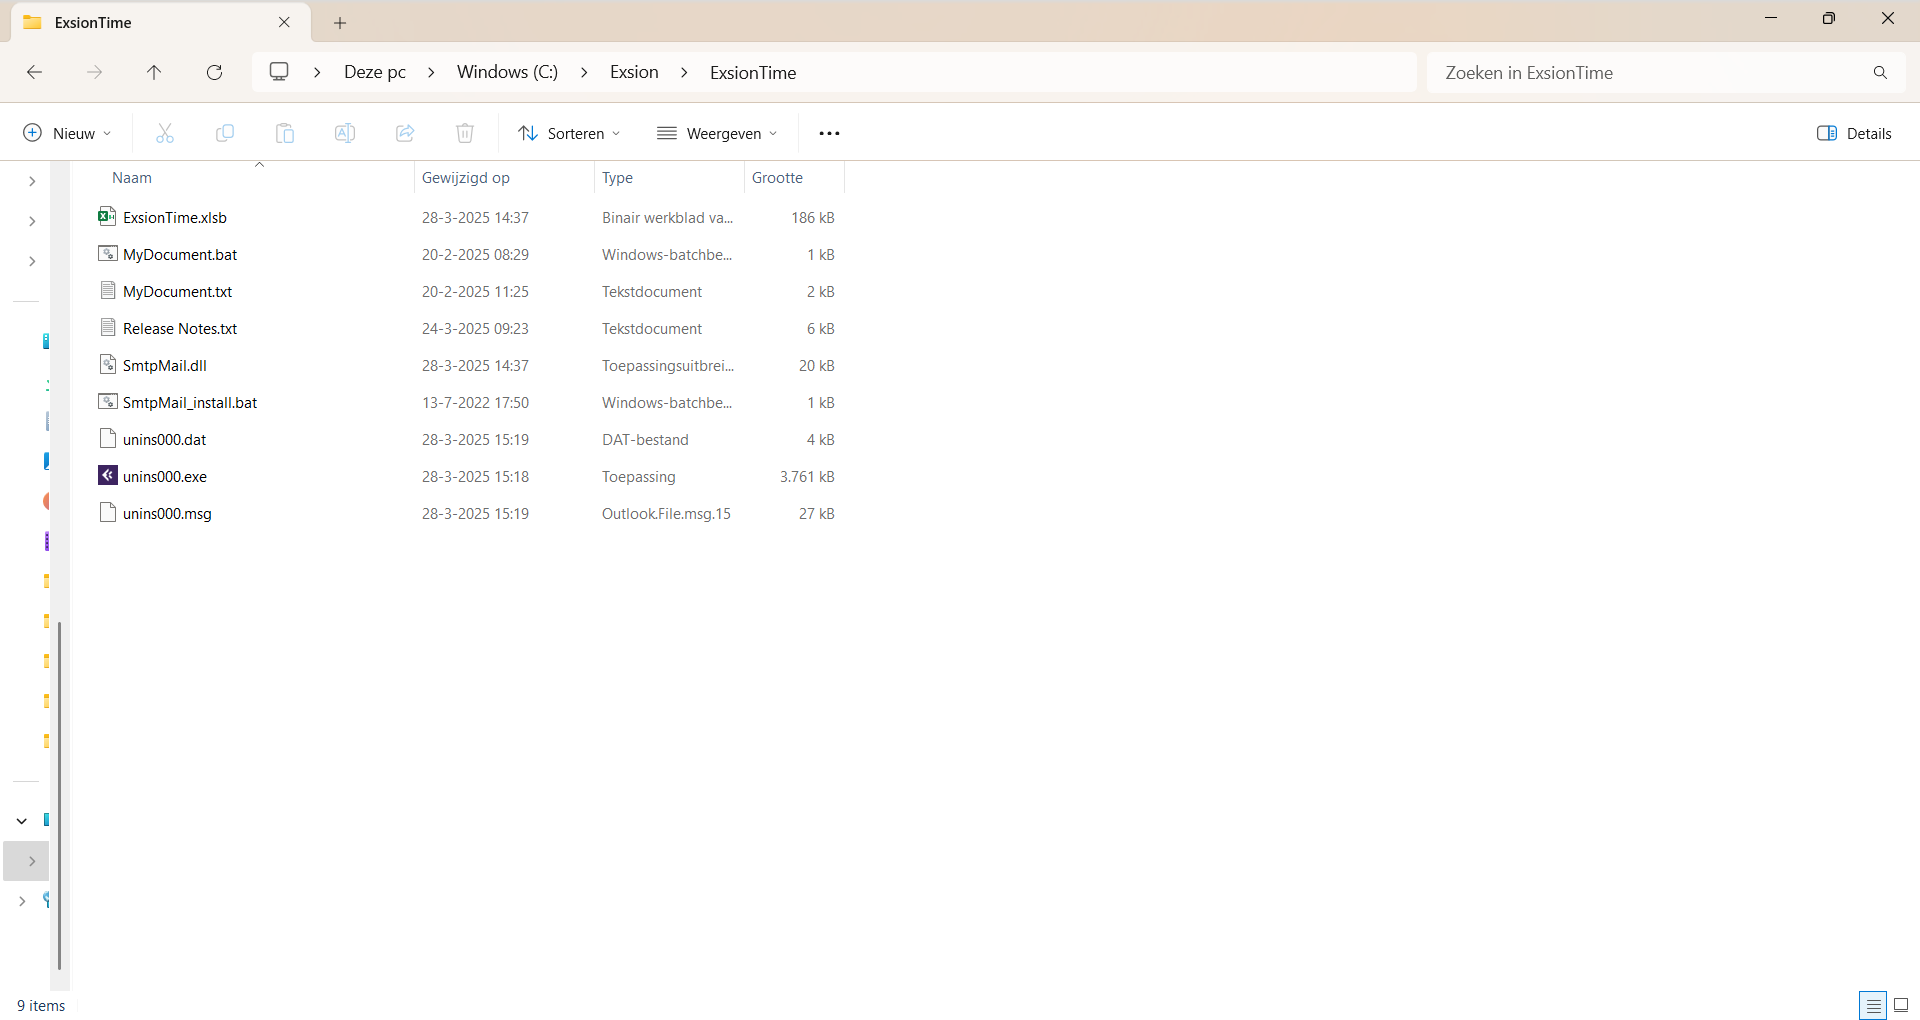
The ExsionTime.xlsb file at the top is used once to configure and test the SMTP server. The following two files
- MyDocument.bat: This is the .bat file that you use to execute all .txt files in the same folder (for best practices for folder structure, go to the chapter Best Practice folder structure).
- MyDocument.txt: This is the text file that we use to specify our options and variables for each report. See the chapter on ExsionTime options for further explanation of this file.
When using ExsionTime, a third file will be added, which is the Excel file that will be refreshed, the Exsion report that we will refresh and send.
With these three files, we will ensure, in collaboration with the Windows task scheduler, ExsionTime & Exsion Reporting, that your reports are refreshed and sent. You can use multiple .txt files for each report to refresh a single report multiple times with different options and/or email addresses.
Best Practice folder layout
To use ExsionTime effectively in practice, we first go through the following steps (please note that these are best practices; if you prefer to do things differently, that is of course also an option):
Create new folders in the folder called ExsionTime.
| Folder | Description |
|---|---|
| Logging | Here you can then save the logging per file or for all ExsionTime reports that have been refreshed. |
| Output | Here you can set up a structure to which all updated ExsionTime reports are sent. This allows you to see what has been sent. |
| Reports | This is where you store all the original report files. |
Example Reports folder
Getting started with ExsionTime
To refresh a report with ExsionTime, we make a copy of both MyDocument files, i.e. both the batch file and the text file.
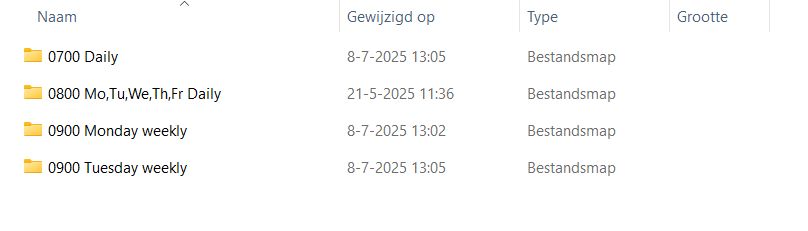
We place these in a different folder. In the example below, we have created a Reports folder, and a folder called “0700 daily” to store our overview.
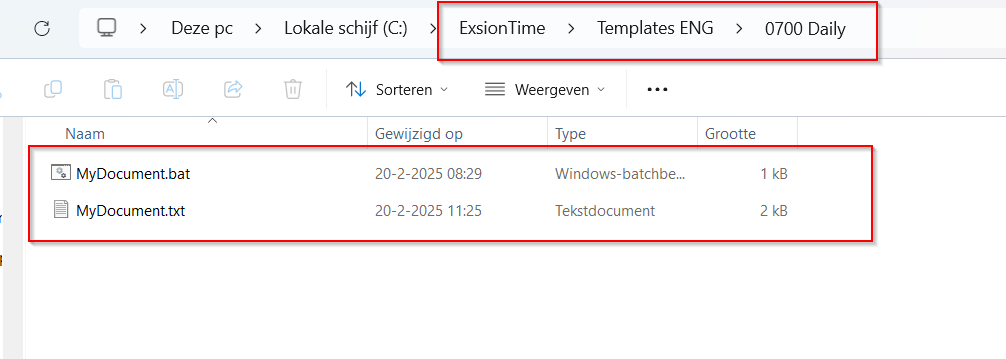
Next, we also put the report in this folder that we want to refresh and possibly send. We have also named both files the same as the report file.

Once the above steps have been completed, we are ready to modify the text file. Open the text file with Notepad or a similar program. Refer to the “ExsionTime Options” section to fill in everything as desired.
ExsionTime options
Exsion edition
| Field | Description |
|---|---|
| EXSION | Specify the ExsionReporting tool to be used (BC, NAV). |
This determines which edition of Exsion should be used, Exsion Business Central (BC) or Exsion for Navision (NAV). These values can be combined, for example EXSION=BCNAV.
Document
| Field | Description | ||||||||||||||
|---|---|---|---|---|---|---|---|---|---|---|---|---|---|---|---|
| DOCUMENT | Here you specify the path and file name of the Exsion Report document that needs to be refreshed. This document will be used as a template and will not be changed!
Example: C:\ExsionTime\Reports\0700 Daily\Accounts receivable Aging Analysis Template.xlsx |
||||||||||||||
| SAVEAS | Here you specify the path and file name where the refreshed report should be saved. You can also choose to add named cells to the name by adding [date]_[supplier].
If there is a named cell with the relevant input in the report in question, this will be added to the name of the saved file. As advised above, here is an example: C:\ExsionTime\Output\Accounts receivable Aging Analysis Template\Accounts receivable Aging Analysis Template_[date]_[supplier].xlsx Here you can choose between the following 6 types of output:
| ||||||||||||||
| COPYTO | Here you specify the path and file name to save a copy of the output | ||||||||||||||
| PROTECT | Enter a password here. This will ensure that the Excel document will contain the password you enter here. When someone wants to open the refreshed report, they will have to enter this password. | ||||||||||||||
| LOGFILE | Enter the path and file name where you want to create a log file. This can be a different file for each report, or you can ensure that all ExsionTime reports are logged in a single file. Example: C:\ExsionTime\Logging\Logging.log or C:\ExsionTime\Reports\0700 Daily\Sales report.log
This file contains all steps, including date and time, that are performed when processing the document. Any error messages can be found here. |
||||||||||||||
| LOGOVERRIDE | Enter a value of 0 or 1 here.
0 = Add the logging to the current logging file (do not create a new document) 1 = Create a new logging file/overwrite the previous logging. |
||||||||||||||
| RUNCMD | Path and name of a program or batch file. This will be executed when all steps for processing the document have been completed. |
Tabs
| Field | Description |
|---|---|
| NAMEDCELL | Enter the value of a named cell from the Exsion Report document here. If you have completed the standard Exsion training, you will have learned how to make intensive use of these cells, as they are used throughout the document and can therefore be set up effectively. It can be used to have ExsionTime place a value in the named cell before refreshing the document. For example, if there is a cell named Customer that needs to contain a customer number, this can be done as follows: NAMEDCELL=Customer:012345 The word Customer is the name of the named cell in question and 012345 is what needs to be entered here before the report is refreshed. The name of the cell and the value must be separated by a colon. |
| FORMULASTOVALUES | Value of 0 or 1. This indicates whether Exsion's formula to value function should be executed. 0 = No, 1 = Yes |
| DTMASK | A date and/or time mask. This can be used to include a date/time in the name of the saved file. For example: DTMASK=DD-MM-YYYY HH:MM C:\ExsionTime\Reports\0700 Daily\Sales_Report_DTMASK.xlsx The date and/or time of saving the result document is then included in the file name. |
| HIDESHEET | Enter the names of the tabs you want to hide in the output file here. Multiple worksheets can be hidden by separating them with a | sign. For example: Sheet1|Sheet2|Sheet3. These worksheets can be made visible again by a user. |
| BLINDSHEET | The same can be done here as with HIDESHEET. These worksheets cannot be made visible again by a user. |
| REMOVESHEET | Enter the names of the tabs you want to remove from the specified worksheet so that they are not present in the result document. Multiple worksheets can be removed by separating them with a | sign. For example: Sheet1|Sheet2|Sheet3. |
| ACTIVESHEET | Enter the tab that will be opened as the active tab when the output file is opened. |
| PDFSHEET | Enter a tab name here or leave it blank. When saving a document in PDF format, this determines which worksheet is exported to PDF. If left blank, all worksheets will be exported to a single PDF document. |
| SAVESHEET | Enter a tab name here if you want to save some tabs to different files. |
| Field | Description |
|---|---|
| NOSEND | Enter the name of a named cell here (see NAMEDCELL in the explanation of named cells). This named cell must contain a formula that returns a 0 or a 1, which is used to determine whether or not the result document should be sent by email: 0 = The document will be sent. 1 = The document will not be sent. |
| MAILTO | Enter one or more email addresses separated by a semicolon (;) here. It is also possible to read these addresses from the template document. To do this, use a named cell with, for example, the name MAILAAN and then use it as follows: MAILTO=[MAILAAN] |
| MAILCC | Enter one or more email addresses separated by a semicolon (;) here. It is also possible to read these addresses from the template document. To do this, use a named cell with, for example, the name MAILCC and then use it as follows: MAILTO=[MAILCC] |
| MAILBCC | Enter one or more email addresses separated by a semicolon (;) here. It is also possible to read these addresses from the template document. To do this, use a named cell with, for example, the name MAILBCC and then use it as follows: MAILTO=[MAILBCC] |
| MAILFROM | Enter the sender's email address here. If using SMTP: Some SMTP servers require this to be the same as the username for the SMTP server. If using Office 365: Please note that the Office 365 registered account must have access to the email address specified here during installation. Otherwise, you will receive an error message in the log stating that the account cannot access this. |
| SUBJECT | Enter the subject of the email here. |
| BODY | This is the text that will be sent in the email. This can also be read from a named cell in the template document. If this is in a named cell with, for example, the name BODYTEXT, use this: BODY=[BODYTEXT] |
| ATTACH | Enter a path and file name here. The document specified by the SAVEAS key is always sent as an attachment to the email unless SKIPDOC is set to 1. Additional attachments can be sent by specifying them here, separated by semicolons. For example: ATTACH=C:\Folder1\File1.txt; E:\Folder2\File2.txt |
| SKIPDOC | Enter either 1 or leave blank. The document specified by the SAVEAS key is always sent as an attachment with the email. If this is not desired, use SKIPDOC=1 |
Refreshing reports
Refreshing reports manually
Once we have a text file as described in the previous chapter, we can execute it. This can be done either with the task scheduler or manually. Below, we will briefly go through the manual method.

In our example, we have one text file and one report in one folder together with the batch file. To execute this, we start the batch file. We do this by double-clicking on it, which will result in the following:
- Excel will start
- Accounts receivable.xlsx will be opened
- Exsion will refresh the data
- The document will be closed
- Excel will close
- (If set in the text file, an email will be sent)
It will now have executed all the options in the text file located in the same folder. If there are multiple text files here, the batch file will also execute them.
Reports refresh automatically (screenshots nog aanpassen)
Below is a brief description of how to have the Windows Task Scheduler perform the above process. For a detailed description of the Windows Task Scheduler, visit this website: https://docs.microsoft.com/en-us/windows/win32/taskschd/using-the-task-scheduler
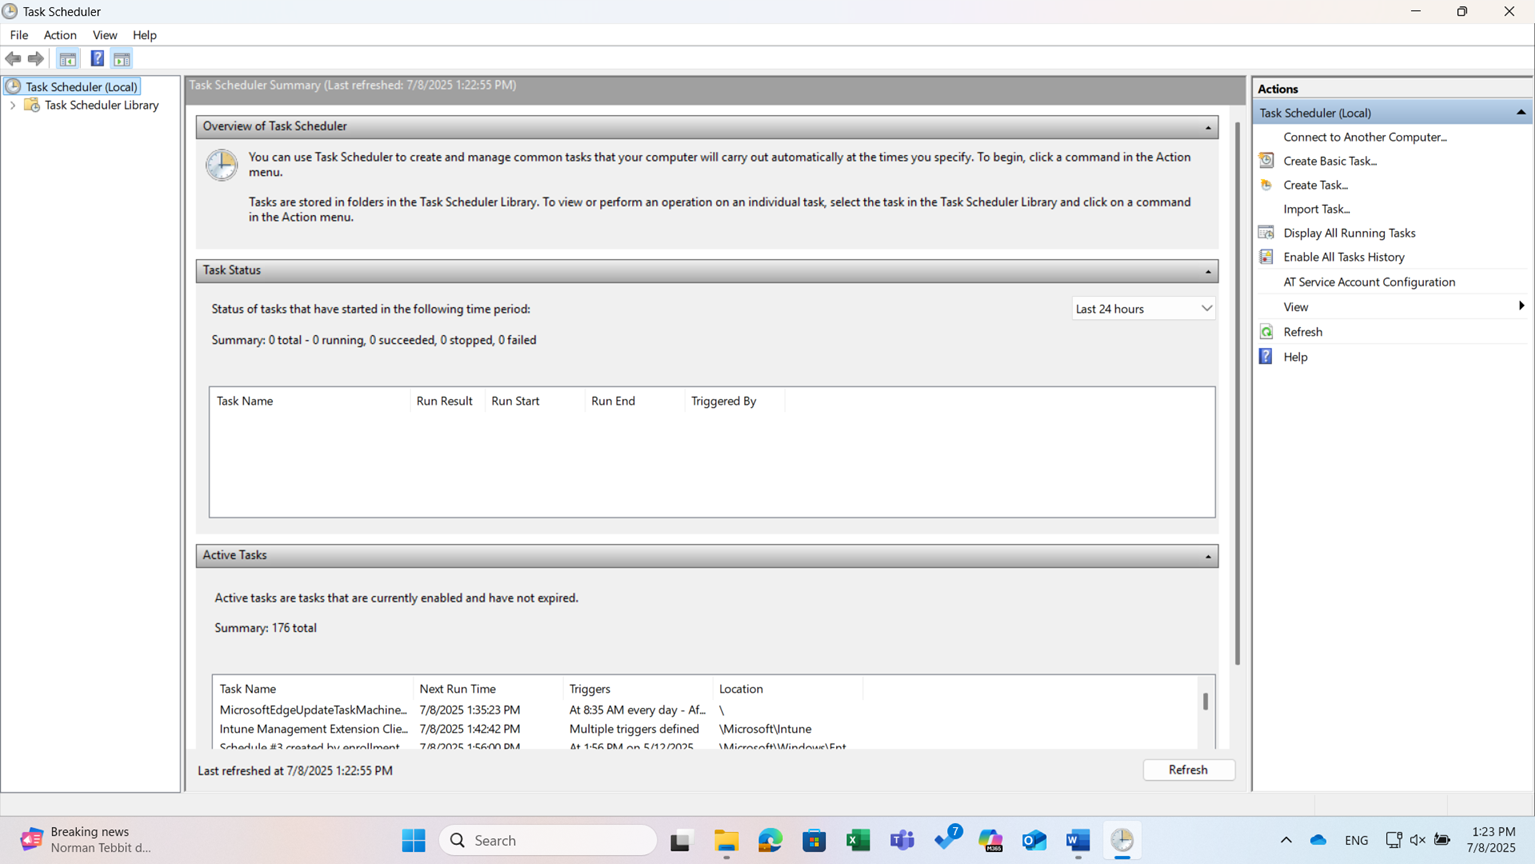
Search for “Task Scheduler” in your Windows search bar and open it. You should then see a screen like the one below:
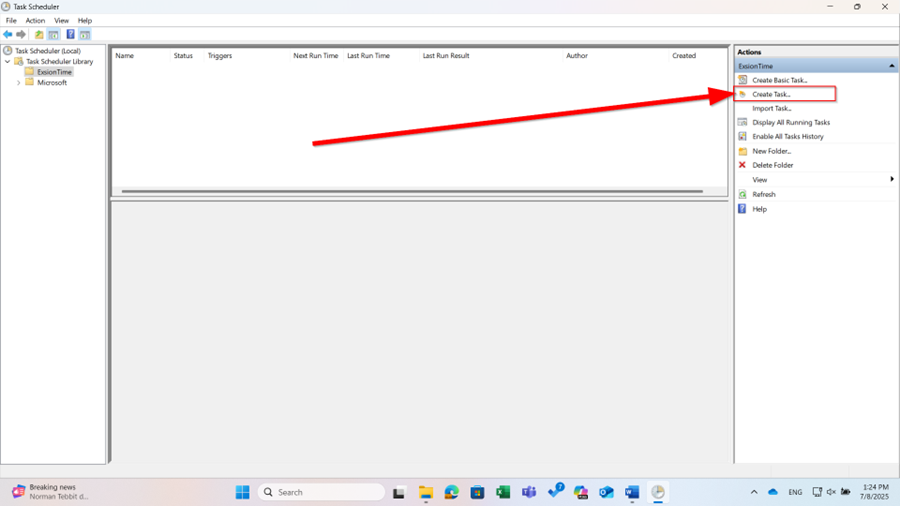
Move your mouse to “Task Scheduler Library” and right-click, then click on “New Folder...” and name it ExsionTime. This folder will then appear under the task scheduler library. Click on ExsionTime to open the folder. It should still be empty at this point.
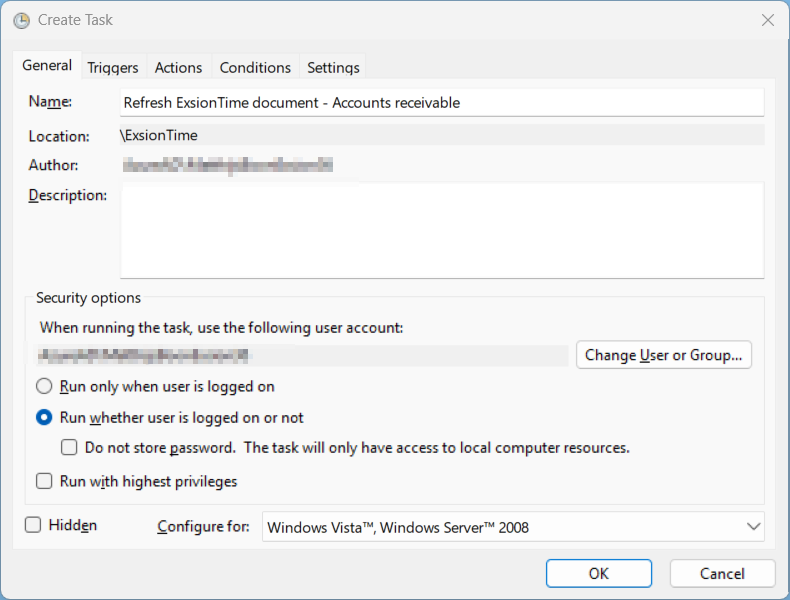
On the right-hand side, click on “Create Task...”
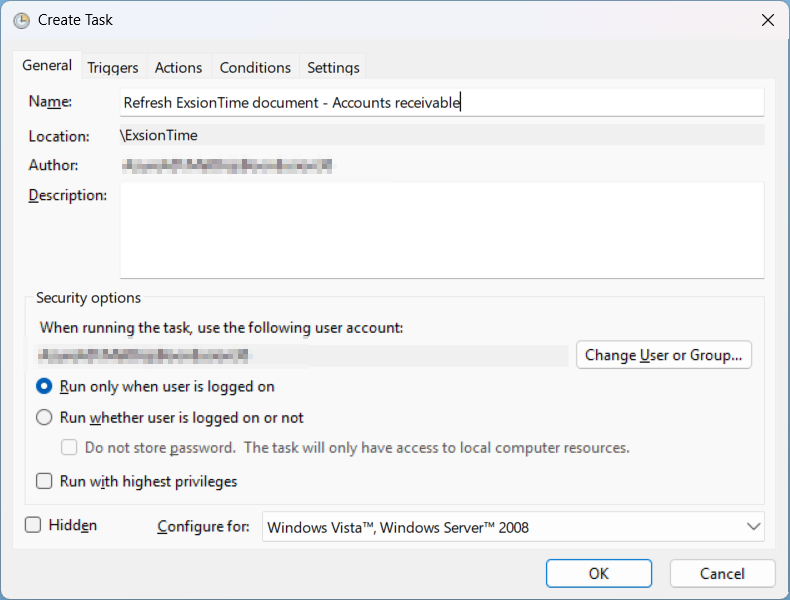
When performing the task for the first time, ensure that the security options are set to “only run when user is logged in.”
The following screen will open; enter a name and description, if desired. Then go to the “Triggers” tab and click on “New.”
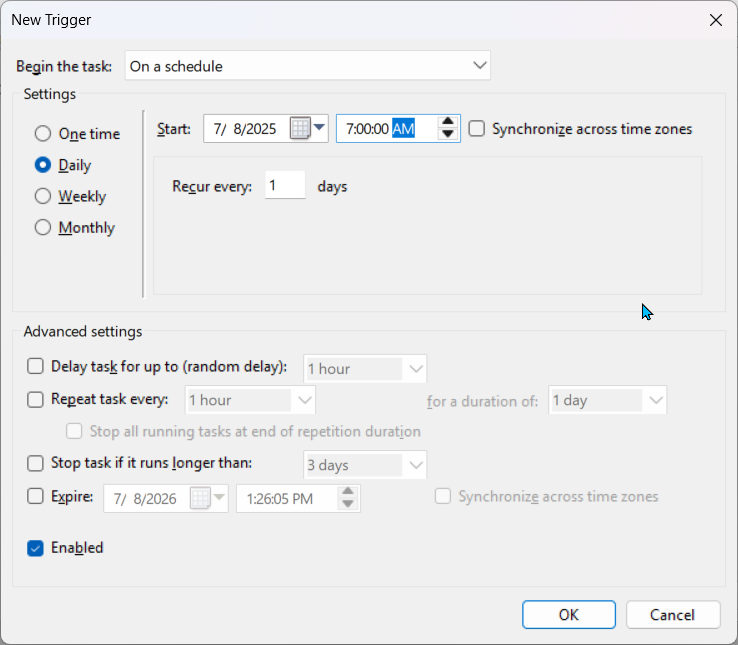
Below, you can specify when and how often the batch file should be started. Click “OK” if you agree with the time settings.
Then go to the “Actions” tab and click on “New” again.
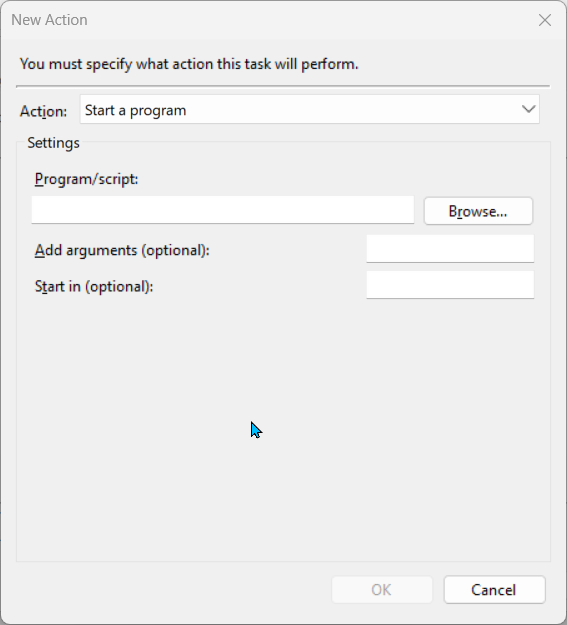
Click on the Browse button and navigate to the folder where you save the batch file. Select the batch file here! In our example, this is:
“C:\ExsionTime\Reports\0700 Daily\Accounts receivable Aging Analysis.bat”
Click OK and then OK again. The task should now appear in the middle of the screen as a task that will be performed at the specified times. Test this once by clicking on Run on the right side of the screen. This will let you know if the task has been completed successfully when the email arrives and the file is refreshed.
Reopen the task and select Run regardless of whether the user is logged in or not. This ensures that even if the user has not opened the server, the tasks will still be executed.